One of the easiest ways to add bookings to the system is using the [Planner].
This method of booking is particularly useful for ad hoc bookings where the client calls in and requests workers on an ad hoc basis.
The planner allows users to easily see the list of available temps, plus an overview of what they are currently doing on any individual day.
Making a booking
Within the TEMP CENTRE, select the [Planner] and use a combination of filters and tick boxes to find the worker(s) that you want.
On older systems, there is no TEMP centre, and the [Planner] can be found within the [Bookings] workbench.
1) Select [ BKD ] from the palette below the planner, then click on the day you wish to book.
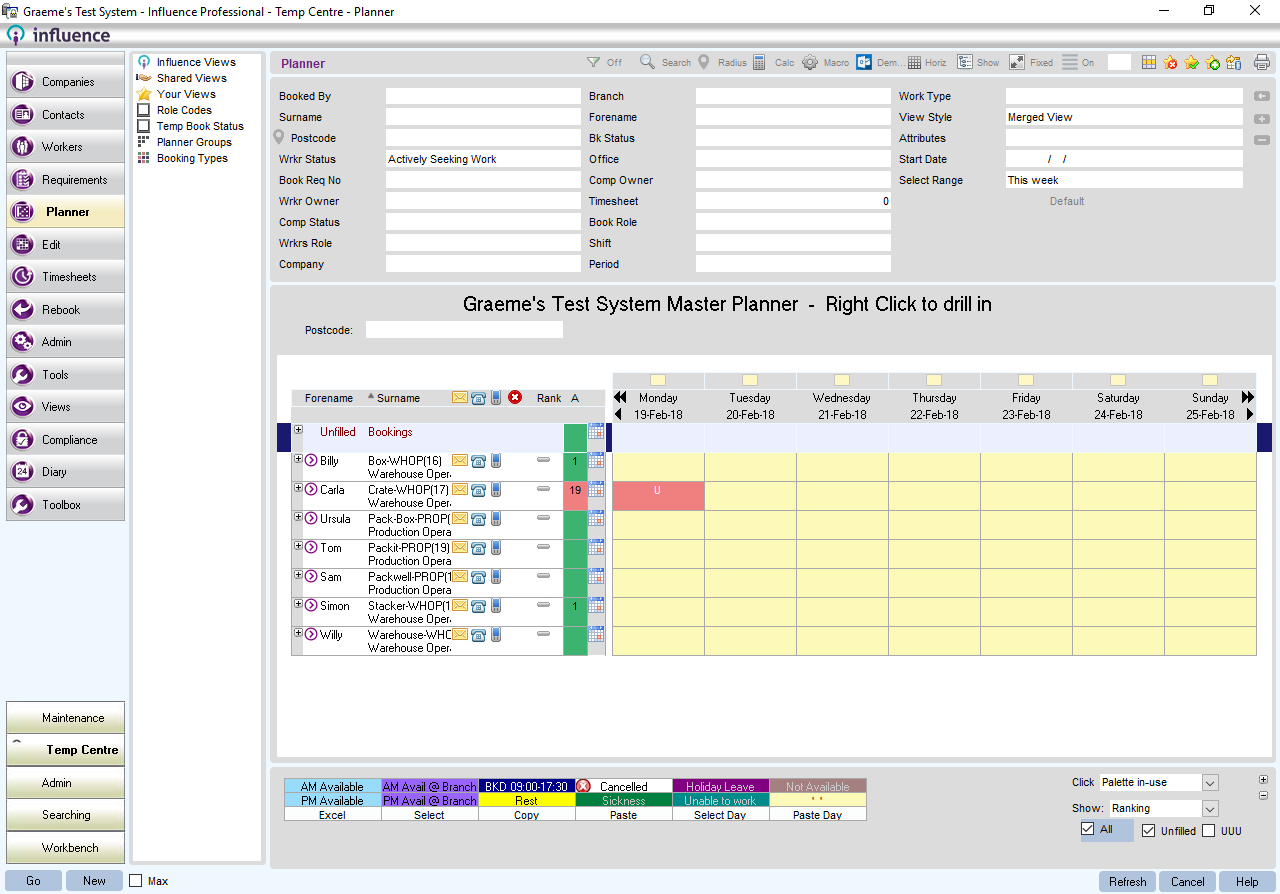
| Tip: Using the All [ ] tick-box at the bottom right will make sure you see all Temps, whether they have any bookings/markers or not. |
| Tip: If you wish to make a booking but have not yet decided which worker you want, ticking the Unfilled [ ] tick-box at the bottom right will display the unfilled row where you can make a booking. |
2) When the Booking Entry screen appears, complete the booking details such as Company, Contact, Role, Booking Date(s) and start/end time (or shift).
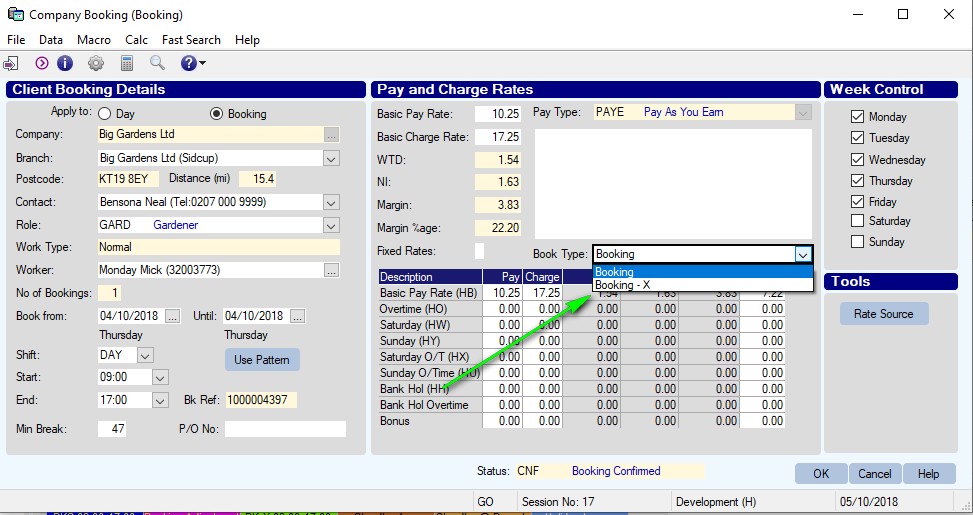
If any rates have been entered on the company record for this particular role, they will be pulled-in to the booking, but can be changed at this point.
| Tip: You can see where rates have been taken from by using the [Rate Source] button at the right hand side. |
From version 1.00.18.278 or later there is the option to change the Booking type at the Booking Entry stage.
| NOTE: If you are making an "unfilled" booking, or have clicked on an existing unfilled booking to try to fill it, the Booking Entry screen will be slightly different and there may be a [Suggest] button at the bottom left. Clicking this will suggest TEMP workers who are available on the required dates, and will indicate any workers who have worked at the required Company and Branch previously (See below) |

3) Having entered the booking details you may be offered the chance to confirm the booking to the Client, to the candidate, or to both parties.
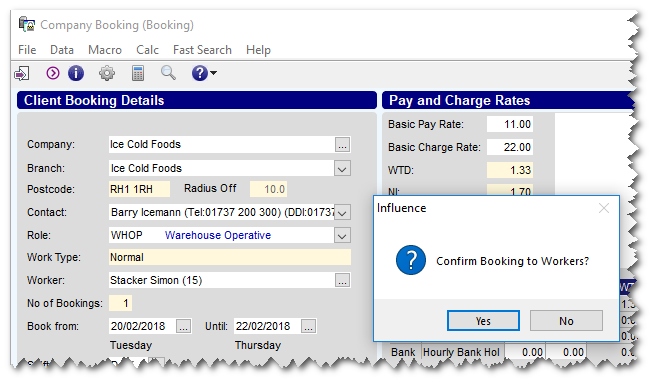
(Confirmations may/may not be offered at this point, depending upon your system set-up and are controlled with a parameter, which can be changed. Please speak to Influence if you wish to change this.)
4) If you have chosen to confirm to the candidate, you will be taken into the Macro Manager screen when you can choose a confirmation template using the 'Template' drop-down.
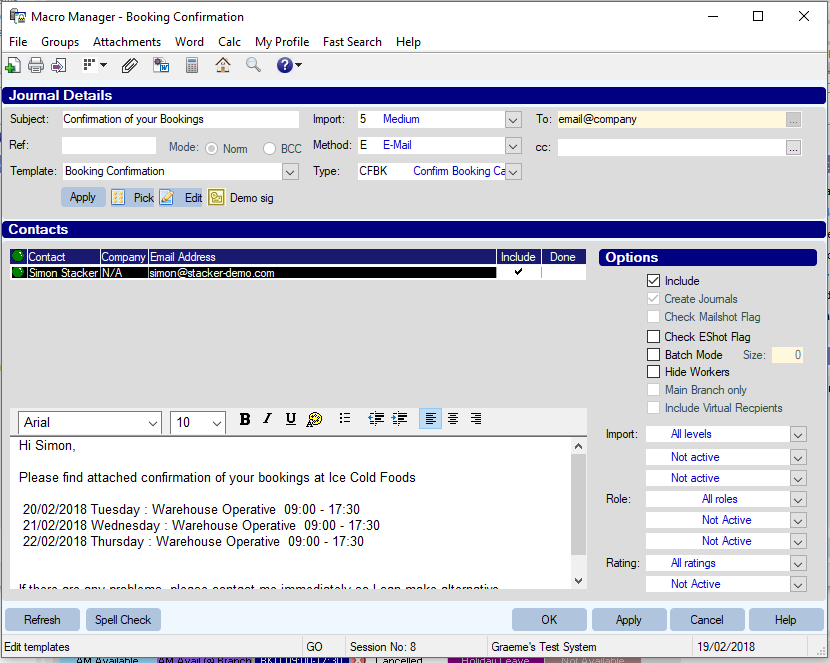
The system will default to sending the conformation by email, but you can change to another method such as SMS (text) by using the Method drop-down at the top-centre.
Pressing [OK] will pass the email to MS Outlook (or send the SMS to your text provider) and allow you to send the confirmation.
| NOTE: When attempting to book candidates the system is normally setup so that users will be prevented from booking candidates whose Status is not "LIVE" (or equivalent) This feature can be turned on/off using Parameter RECD,Flag(2). |
Graeme Orchard
Comments