Newer releases of Influence Professional (Ver. 1.00.14.120 onward) have the facility to add GROUPS.
GROUPS are sets of candidates (or Contacts, Vacancies or Companies) that users can create which can then be used for matching or further searching. For information on sharing groups click here and for examples of using groups click here. You can click here for information about using groups to filter a candidate search.
After Version 1.00.18.100 Groups allows setting of Values (fields), Status, Owner and Notes (text) or Opting IN/OUT/Asking about a Policy for all members of the Group.
From version 1.00.18.253 there is the ability to archive documents to a specified folder for all members of a GROUP.
From version 1.00.20.276 users are able to Set Text for a Group of candidates using the properties of the Group
From Version 1.00.21.089 or later users are able to make GROUPS for 'other' Objects.
e.g. The [Vacancy] workbench allows users to create Groups of Vacancies, Companies, Contacts or Candidates.
CONTENTS (Click an Item to Jump to that section)
Creating groups from the workbench
Creating a group from a list of email addresses
Creating groups from Assignments
Sharing Groups
Organising Groups by importance/sorting
Mass updating records using Groups
1. Set Policy
2. Set Values
3. Set Status
4. Set Owner
5. Set Notes
Group management within records
Matching candidate group to a vacancy
Allocating attributes using Groups
Archiving documents for members of a groups
Using group to set text
Examples of using Groups
Creating Groups from the Workbench
The following workbenches allow the use/creation of GROUPS
[Candidates]
[Companies]
[Contacts]
[Vacancies]
Within the Favourites bar you will see some new selections relating to GROUP management. Clicking the small [+] next to any item will expand that section.
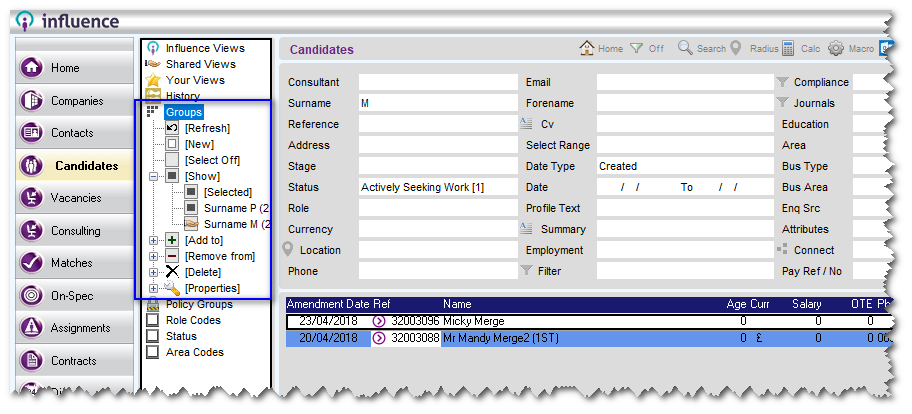
| [Refresh] |
This will rebuild the list of groups after any changes/new groups are added |
|
| [New] |
This will allow you to create a new group. |
|
| [Select] |
Clicking this will turn select mode on or off; With Select on users can click on multiple candidate names from the workbench and then add the selected candidates to a group. Selected candidates are displayed with a yellow highlight as well as a [tick] to indicate they have been selected. |
|
| [Show] |
This lists all the groups available to you and the number of records in the group. Clicking a group will display all the candidates in that group. If a group is being displayed the name of the selected group is shown at the top left of the workbench. From v1.00.17.019 right-clicking a group will allow you to specify an Importance. Groups are sorted alphabetically in importance order |
|
| [Add To] |
Adds all displayed candidates into the chosen group <or> if Select Mode is on then the system will add the selected candidates to the chosen group. |
|
| [Remove From] |
Removes all displayed candidates from the chosen group <or> if Select Mode is on then the system will remove the selected candidates from the chosen group. |
|
| [Delete] |
Completely removes a group and all its members. |
|
| [Properties] |
This allows you to control details about a group such as the name, access control, etc. Using this section it is possible to share groups with others
|
From v1.00.21.089 or later workbenches allow creation of 'Other' Group Types
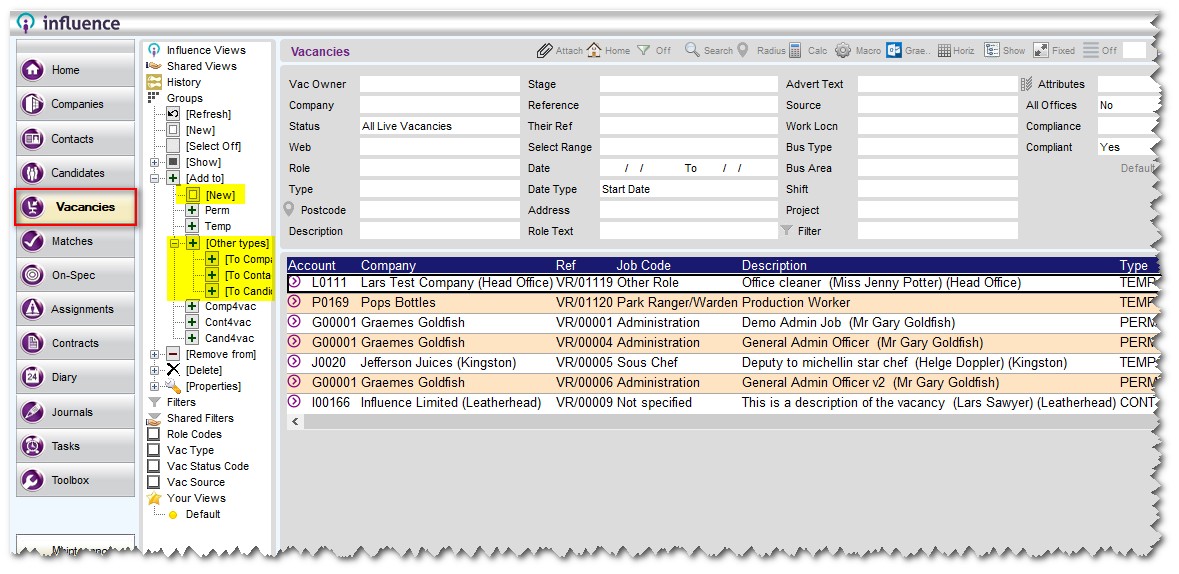
| Workbench |
Allowed GROUP Types |
| [Companies] |
Companies, Contacts |
| [Contacts] |
Contacts, Companies |
| [Candidates] |
Candidates, Contacts |
| [Vacancies] |
Vacancies, Companies, Contacts, Candidates |
Example: From the [Vacancy] workbench you can now make a GROUP of Vacancies, Companies, Contacts or Candidates.
This means you could create a GROUP containing a list of all Companies who currently have a Vacancy at the 'Offer' Stage, and then export or use that Group for further analysis or marketing.
Creating a GROUP from a list of email addresses
(Feature available from Ver 1.00.22.025 or later)
It is possible create a GROUP of Contacts/Candidates from a list of email addresses.
Using the new tool from Maintenance > Tools > Create Group from Email Address List users can copy/paste a list of email addresses.
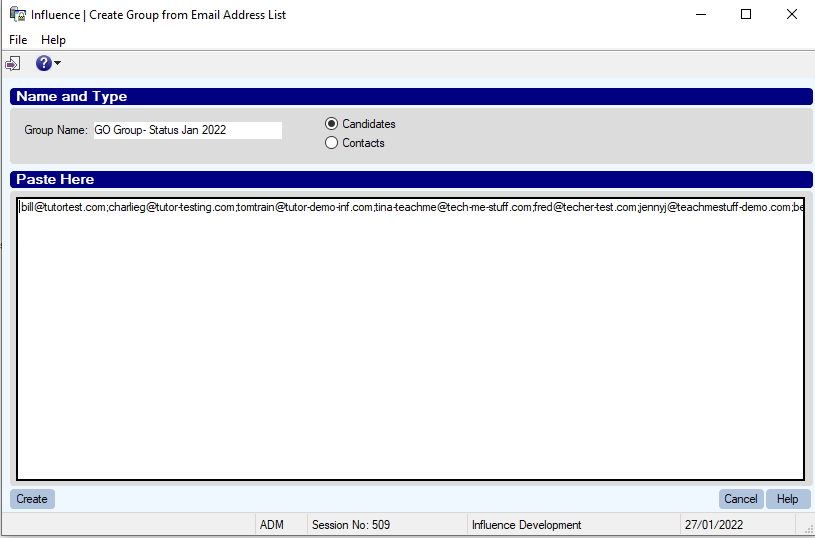
When they press [Create] the system will look for matching email addresses in the database and will use those to create a GROUP.
The GROUP can then be used to mailshot all of the member or as a means to mass update details such as 'Status'.
Create GROUPS from Assignments
After version 1.00.17.339, a new facility has been introduced to allow users to create GROUPS from within an Assignment (Headhunt).
From within the [Assignment List] tab users can create GROUPS of Candidates, Contacts or Companies based upon those individuals or organisations which have been linked to the assignment.
How it Works
Go to the assignment and choose the Assignment List tab
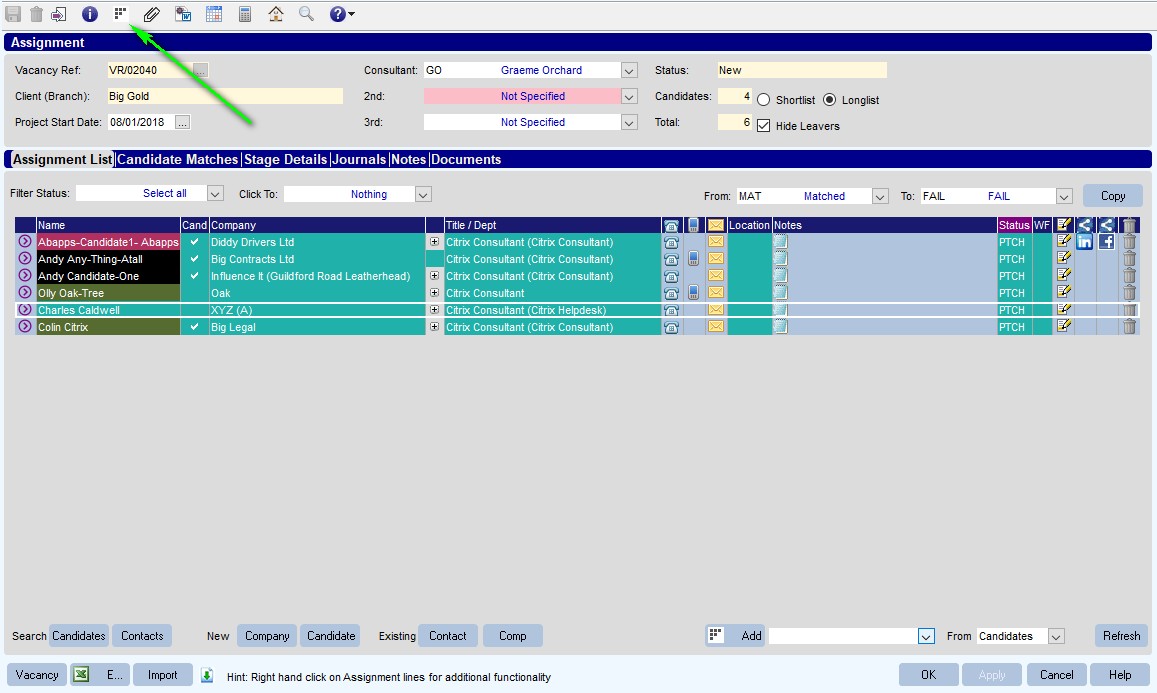
At the top of this page you will see the Groups icon. [Looks like 'Blocks'.]
Click this icon to open the Assignment Group Maintenance screen.
Within the Assignment Group Maintenance screen, use the tick boxes to select either Candidates [ ], Companies [ ] or Contacts [ ] depending which type of GROUP you wish to create.
| ALSO >> Use the MODE drop-down at the right hand side to select the correct type of group to match the Tick box selection. (e.g. Candidates [x] and Mode: [Candidates] ) |
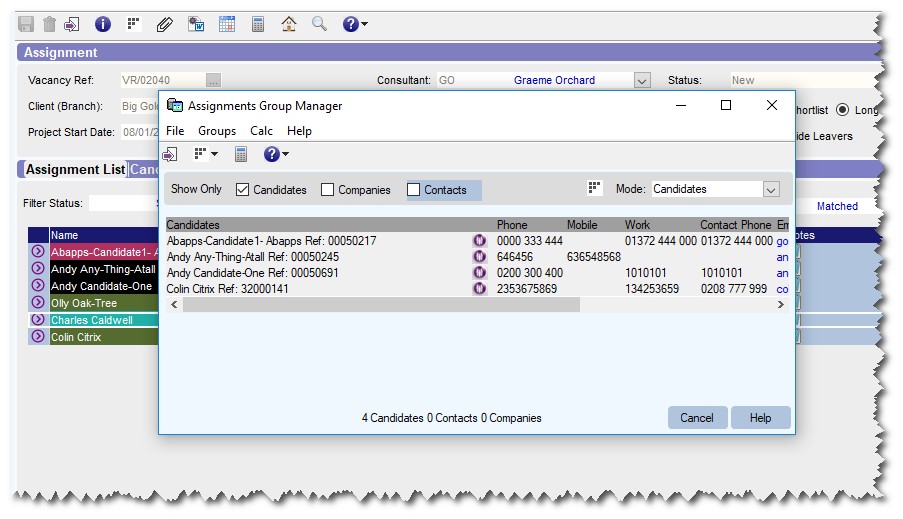
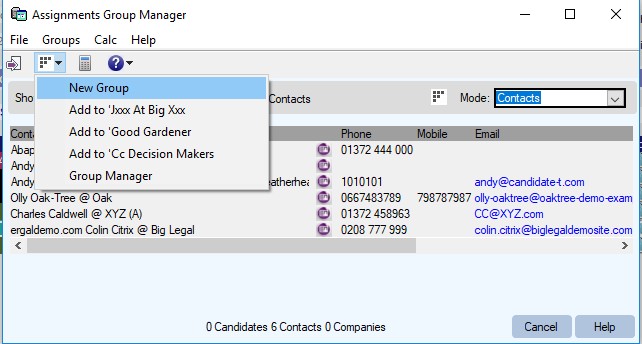
Having ticked the type, and selected the MODE, click the Groups icon within the Assignment Group Maintenance Screen and choose either New Group to add a new group, or select Add To ..... to append the items to an existing GROUP.
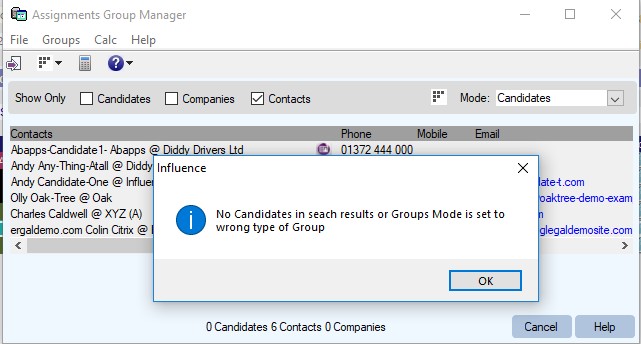
Example of Error
If you have a mismatch between the type and the MODE, the system will display a warning screen as below.
e.g. In the example below we have selected type as Contacts, but the MODE as Candidates.
Sharing Groups
From version 1.00.14.311 onwards it is now possible for users to share their Groups with other Influence users.

If you are the owner/creator of a Group, then you will always be able to get into the properties section for that Group.
From within Properties you are able to share your group with other USERS, TEAMS, OFFICES or ALL
How to Share a Group
Expand the +[Properties] section and select the group you wish to share.
Click the Show All [ ] tick box and the scroll to find the user(s) you wish to share the group with.
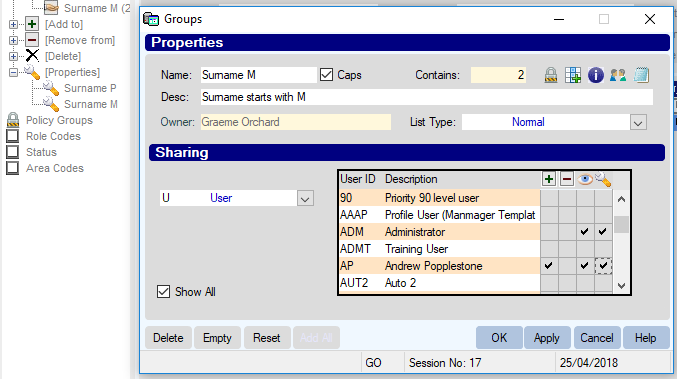
| [+] |
Tick this to allow the user to ADD to the group |
| [-] |
Tick this to allow the user to REMOVE items from the group |
 [Eye] [Eye] |
Tick this to allow users to VIEW to group. |
 [Spanner] |
Tick this to allow users into the PROPERTIES of the group (and hence to re-share the group) |
| NOTE: If you have shared a Group and then try to delete that Group, the system will display a warning informing you that the Group is shared. You may still be allowed to delete the Group, but will know that your actions will affect others who may have been using the Group. |
Organising Groups by Importance/Sorting
From version 1.00.17.019 onward there is now a facility to sort and organize groups.
At the left hand side of the relevant workbenches (Candidates, Contacts, Vacancies, etc.) it is possible to order the groups.
If you expand the show section, you can right-click on any of the existing Groups and select an Importance
Once a group has been assigned an Importance you will see a coloured block next to the group.
All the High importance groups will be shown near the top, the Medium importance groups below that and the Low importance groups below that.
Within each importance section, groups will be sorted alphabetically.
Additional Considerations
It is not possible to assign an importance to a shared group; only the group owner can do this.
Groups without an Importance (i.e. Normal) are shown at the top of the list.
After any changes have been made you can use the Refresh button at the top of the Groups section to re-draw and show these changes.
Mass update of Records using a Group (Values, Owner, Status, Notes & Policy Subscribe)
From version 1.00.18.138 it is possible to update a batch of records (Candidates, Contacts, Clients or Vacancies) by creating a GROUP and then updating all members of the GROUP.
(If you are on an earlier version of the software this was done in a different way - see this article HERE.)
| IMPORTANT - The mass update of records via GROUPS is usually restricted to the UserID "ADM" only, but additional users can be specified with parameter Workbench,Text(4) - Additional UserID for Bulk Field Change. |
The examples below are all based around [Candidates] but the same principles apply to Contacts, Companies and Vacancies.
1) Login as 'ADM' and use the relevant workbench [Companies], [Contacts], [Candidates] or [Vacancies] to create a GROUP containing all the object you wish to update.
(If you cannot login as ADM, then login as yourself, create the GROUP, then share it with the ADM User - see step(2) )
2) Having created the GROUP you will need to share the GROUP with the userID "ADM" (unless you were logged in as ADM when you created the Group, in which case you will already be able to see the Group.)
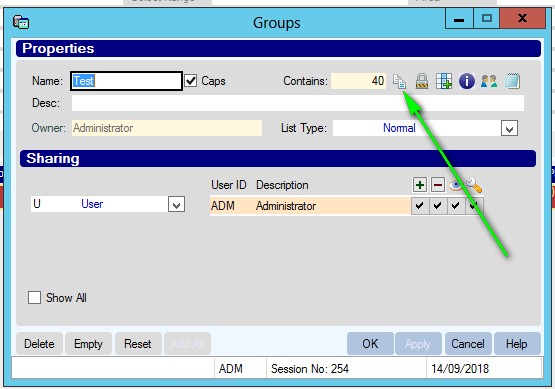
3) Login as "ADM", go to the relevant workbench and select the GROUP. Choose Properties and open the Group Properties.

At the top right of the Properties screen are some icons which will allow the mass update of this GROUP.
Policy  (Padlock) (Padlock) |
This icon will allow you to subscribe people to a policy. They can opt IN/OUT/ASK. |
Set Values(Grid) |
This allows users to update the value of any field in the table. e.g. If you had a GROUP of candidates you could set their 'Current Basic' to £28,000 for all GROUP members. |
Set Status(i) |
This allows you to set the STATUS for all records in the Group, e.g. You might set the STATUS for several vacancies to "LOST" or several clients to "PROS" (Prospect) |
Set Owner (Heads) |
This will set the Owner for all records in the Group. |
Set Notes(Notepad) |
This will allow you to create and assign a NOTE to all members of the Group. This note will be accessible from the small 'notepad' icon in the toolbar of each record. |
| NB: Each of the options above will require a PASSWORD to be entered before the action will be performed. Passwords can be found in the 'Password' cabinet in Maintenance > Setup > Parameters Groups, which is probably only accessible by the ADM userID, or other 'high level' users. |
If any records in the Group are being edited by another user at the time that the update is run, they will be skipped, but a warning message will be displayed. Each of the options are described in a little more detail below.
Set Policy (en Masse)
Expand the Properties section at the left, and choose the relevant GROUP.
When the pop-up window opens, click the policy icon *padlock* and enter the password when prompted.
Then select a Policy and choose Opt IN, Opt Out or ASK
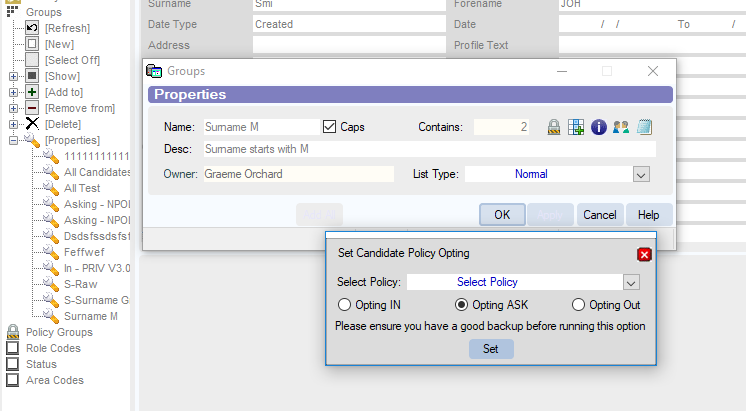
All members of the Group will be subscribed to/removed from the selected policy or in the case of ASK they will be added to the relevant Policy manager Group.
Set Values(en Masse)
This allows users to update the value of any field within the record.
Expand the Properties section at the left, and choose the relevant GROUP.
When the pop-up window opens, click the Set Values icon (looks like a little *Table* with a +) and enter a password when prompted.
Use the drop-down to select the field you wish to set, then type a VALUE for the field.
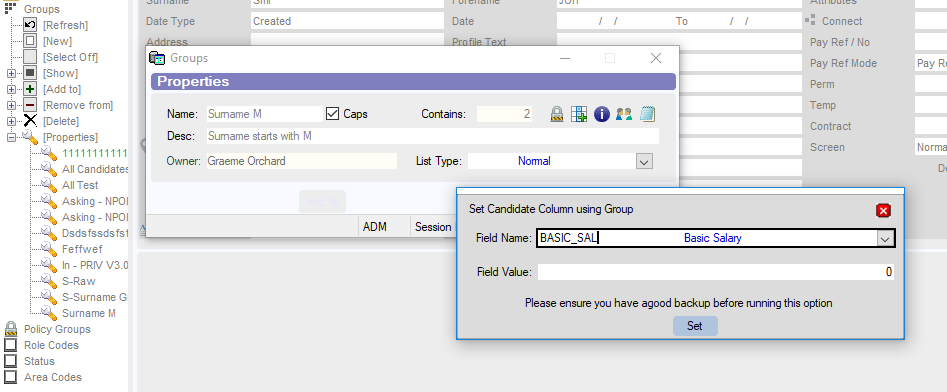
The field will be updated to the chosen value for all members of the GROUP.
Please note that fields are CASE sensitive, so LIVE is different than Live
| NB: After version 1.00.18.145 fields from the associated Contact Record are also available. This means (for example) that you an set the e-Shot flag which affects a GROUP of candidates by setting this on the Contact record. |
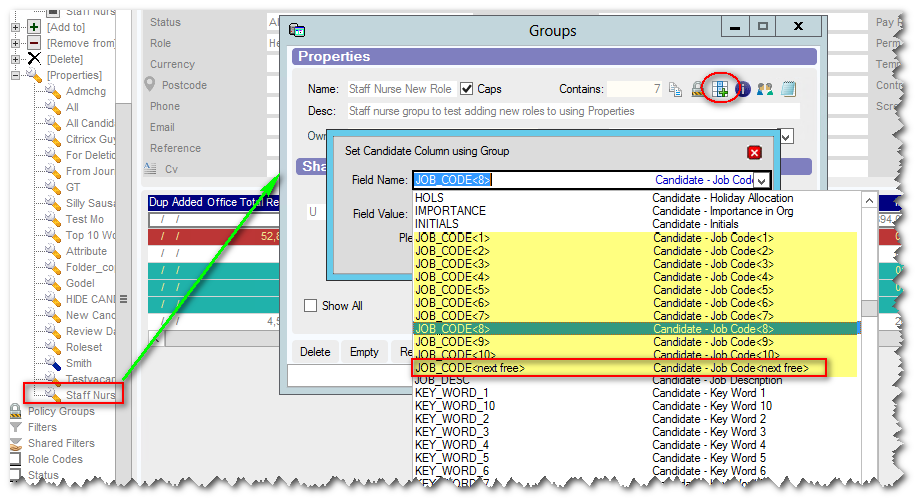
| Important: After release 1.00.20.205 it is possible to use this to set items multi-occurrence such as "Sought Role" on candidate records. It is a case of selecting the relevant <Occurence> of the field or the special <Next Free> to add the code to the next free 'slot' on the record. |
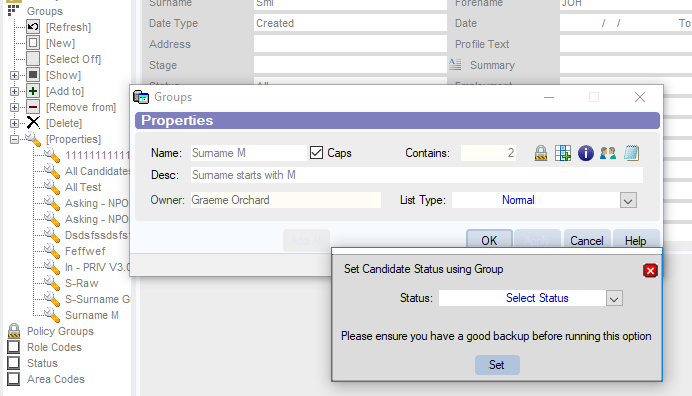
Set Status (en Masse)
This allows users to update the Status for records.
Expand the Properties section at the left, and choose the relevant GROUP.
When the pop-up window opens, choose the Status icon (i) and enter the password when prompted.
Use the drop-down to select a new status, then click [Set] to update all members of the Group.
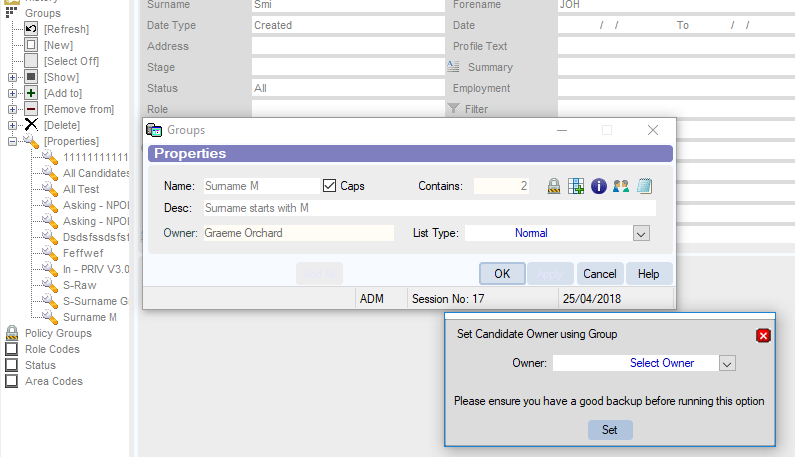
Set Owner (en Masse)
This allows users to update the Owner for records.
Expand the Properties section at the left, and choose the relevant GROUP.
When the pop-up window opens, click the Owner icon *heads* then enter the password when prompted.
Use the drop-down to select a user, then press [Set] to update all members of the GROUP.
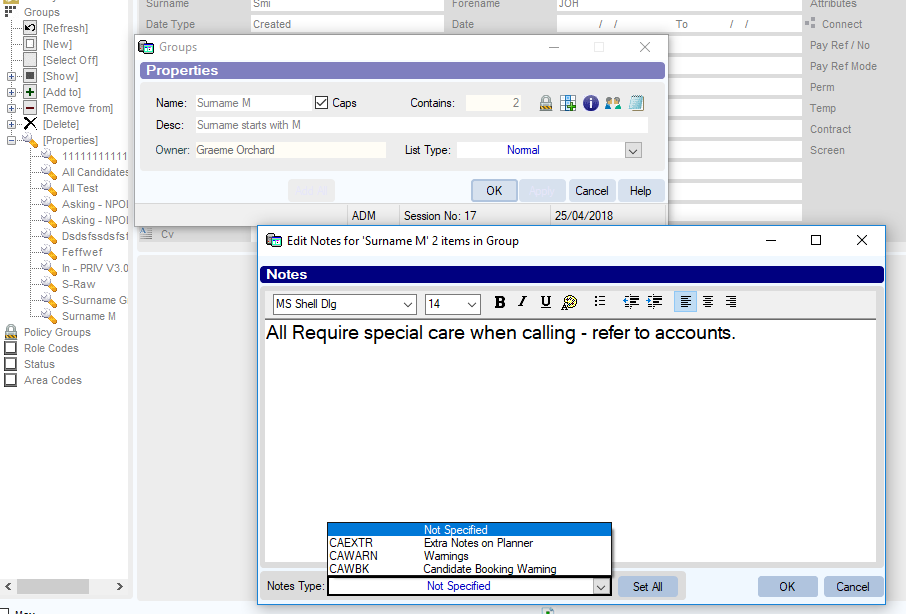
Set Notes (en Masse)
This allows users to update the Text Notes held against all records in the GROUP.
Expand the Properties section at the left, and choose the relevant GROUP.
When the pop-up window opens, click the Notes icon (*Notepad*) and enter the password when prompted.
Type your note into the large white text box, then use the drop-down at the bottom to chose the relevant notes field to record this into. Press [Set] to store the note for all records in the GROUP.
Group Management from within Records
The following records have a new ‘Group Management’ icon at the top of the screen.
- [Candidates], [Companies], [Contacts] and [Vacancies]
At the top of a record a new Groups icon has been added to the toolbar. This allows you to add the current record to existing Groups, create a new Group or remove them from existing Groups.
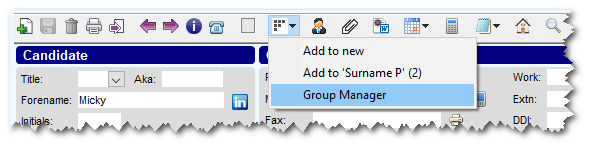
| Add to New |
Choosing this option opens a window to allow a new group to be created, and adds the current record to the newly created group. |
| Add To ‘xxxx’ |
This option will add the current record to an existing group. |
| Group Manager |
This allows you to either add or remove the current record from multiple groups at once. |
Another useful icon in the toolbar is the 'Selection' box.
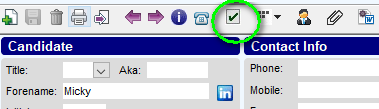
| [ ] Selection |
Ticking the box turns on SELECT mode on the workbench, and allows you to begin selecting records. Use the two purple arrow buttons to page Fwd/back through a list and select records in turn. |
| NB: The group drop-down will only show a maximum of 20 groups - if you have more then this setup then only the first 20 will be shown. To access other groups use the Group Manager Option within the drop-down. |
Match Candidates to a Vacancy using Groups
The new Groups facility is ideal for creating MATCHES. You can use a Group of candidates and match then to various jobs, or you can create a Group of Vacancies then go into an assortment of candidates and easily MATCH them to this selection of vacancies.
1) MATCH Candidate to a Group of Vacancies.
Go to the candidate record and select the [MATCHES] tab of their record. Use the Groups drop-down to select a pre-created group of Vacancies then press the [Create] button to create a match to each vacancy.
2) MATCH Groups of Candidates to a specific Vacancy.
Go to the relevant Vacancy record and select the [MATCHES] tab. Use the Groups drop-down to choose one of your candidate Groups and click the [Create] button to create a set of candidate matches.
Allocating Attributes (Skills) using Groups
| (This feature is only available if using Attributes – it is not applicable to older ‘Key Coding’ systems) |
It is possible to create a group (Candidates, Clients or Contacts) and then use the Attribute Toolkit to assign a particular attribute or skill to the chosen group.
Choose Maintenance > Tools > Attributes Toolkit. Once open, select an attribute from the left.
Then choose the TYPE of group and a Group using the drop-down menus at the bottom right. Finally, Use [Add] or [Remove] to add or remove the Attribute from the group members.
Having assigned (or removed) the attribute to/from the group, press [OK] to exit the option and return to the Workbench.
Archiving documents for members of a Group
Open the Group properties, click the 'archive documents' icon at the top right and then specify a folder path on the server.

| NB: This facility is only available after release 1.00.18.25 |
Using a Group to Set Text
(Feature available from Ver 1.00.20.276 or later)
It is possible to create a candidate Group, and then use the Properties of the GROUP to 'Set Text' for all the members of the Group. This facility is only possible when logged in with the UserID "ADM".
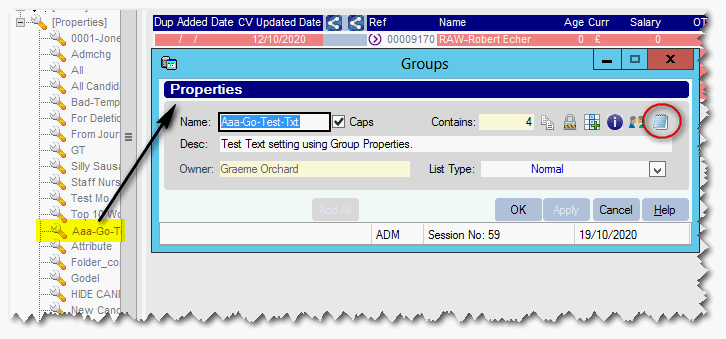
i) Create a Group of candidate and give the Group a name.
ii) Go to 'Properties', select the Group, and click the 'Set Text' icon. (It is a small notepad, see below)
iii) Once the Set Text screen appears, type the text that you wish to set, then use the Drop-down to select the type of text you wish to set.
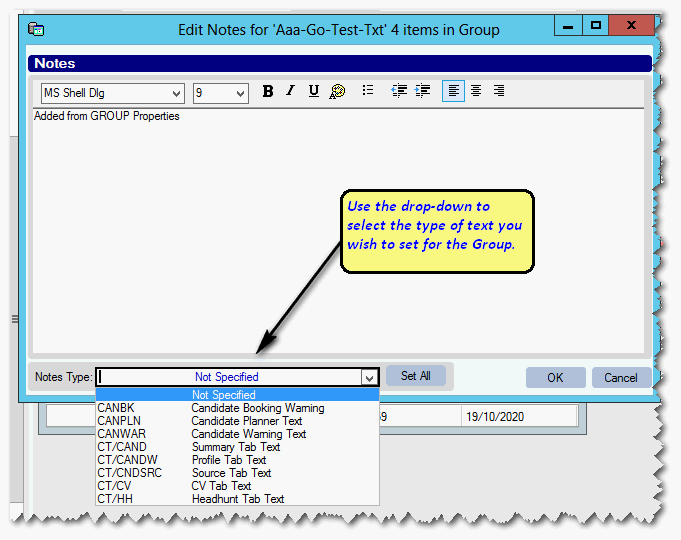
- Text on the [CV] tab of a candidate record. (Useful if you have no CVs)
- Text on the [Summary] tab, [Headhunt] tab, [Profile] tab or [Source] tab of a candidate record (if Displayed).
- Any 'Warning' note Text or 'Free Text' type notes (230)on the candidate record. (See above)
Examples of using Groups
Below are some examples of how to use the Groups feature of Influence professional. For information on sharing groups, click here
|
(NB: This is only available for systems using Influence Professional, versions after 1.00.14.126 ). For information about using Groups to filter a candidate Search, click here |
Example 1
To create a new GROUP of candidates with the word “Sage” and “Accounts” on their CV you would to the following;
- Use the CV text search filter to look for CV Text [“Sage” and “Accounts”] then press [OK]
- When the list of candidates is returned, select GROUPS in the ‘Favourite Views’ section and click the [New] option and create a new group, called “My Sage and Account Group”
- Finally, select the [Add To] option and choose your new group and click the [Ë] to add them to your group.
Example 2
To add a selection of candidates to a new group, do the following;
- Use the [Candidates] workbench to find several candidates using whichever filters you like.
- From the ‘Favourite Views’ section tick next to [Select Off] – this will turn on Select Mode.
You may then click on several candidates in the list to select them. When selected the Name will be highlighted (in yellow) and a [ü] will appear next to their name. The candidate is now selected. - Finally, select the [Add To] option, choose the group you wish to add the selected candidates to, then click the [Ë] to add them to the chosen group.
Example 3
To remove some people from an existing group, do the following;
- Use the [Candidates] workbench and select the existing group using [Show ]
- Having selected the group, turn on Select Mode using [ü] [Select]
You may then click on several candidates in the list to select them. Selected candidates will have their Name highlighted (in yellow) and a [ü] will appear next to their name. The candidate is now selected. - To remove these candidates from the group, select the [Remove From] option, choose the group to remove
them from and then click the [-] to take them out of the group.
Graeme Orchard
Comments