Having run various searches to identify this data and put the data into Groups there are various tools you can use to assist in removing this data from your system.
Contents
Set Records to 'Deleted' Status en-masse
Delete batch of Records within date range
Full on-disc deletion of records
Delete a Record Individually
It is possible to delete a record individually. To do this go into the record, and click the small 'bin' at the top of the screen. The first time you do this the system will change the status of the candidate to DEL (Marked for deletion)
Once the candidate is at a status of DEL clicking the bin a second time will delete the record from the database.
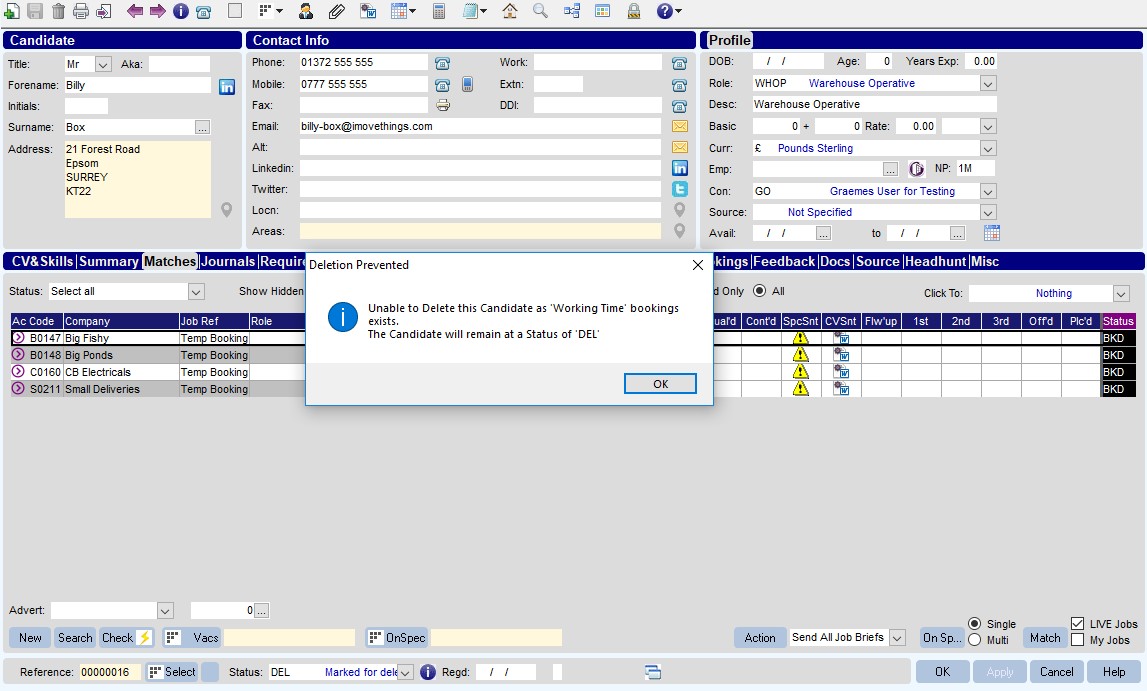
| NOTE: If there are reasons the candidate cannot be deleted, such as the fact that they have any bookings, you will be warned of such, and the candidate will not be removed (see above for example) |
Set records to 'Deleted' status en-masse
If you have created a group of people, it is often useful to set the status to DEL for the whole group. This can be done in a couple of ways.
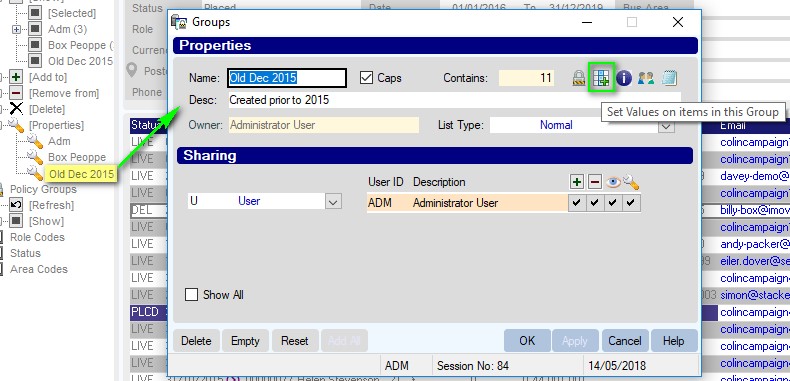
After version 1.00.18.100 You can open the properties of the group and set the status for all the records in thr Group.
i) Choose the group properties at the left of the workbench.
Once the window opens, select the icon to Set Values on a Group.
You will be asked for a Password to continue - this should be known to your system administrator. If not, get them to email Influence and we can tell them.
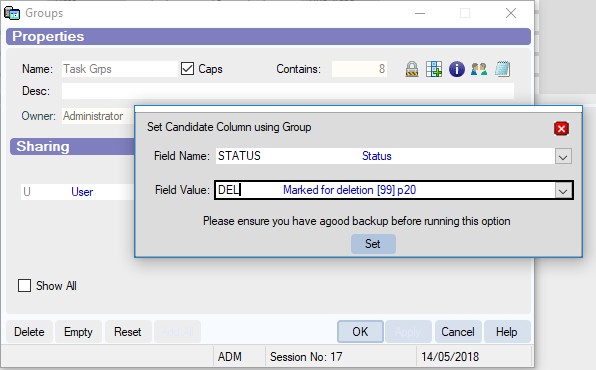
ii) Use the drop-down to choose the Status field and the set the value to DEL - Marked for Deletion. Click [Set] to make the change.
All versions (Incl. those prior to version 1.00.17.213) If you have a version prior to the facility above, you can set the status in the following way.
i) Login as the user "ADM". Then go to [Searching] > choose [Candidates], then select [New]
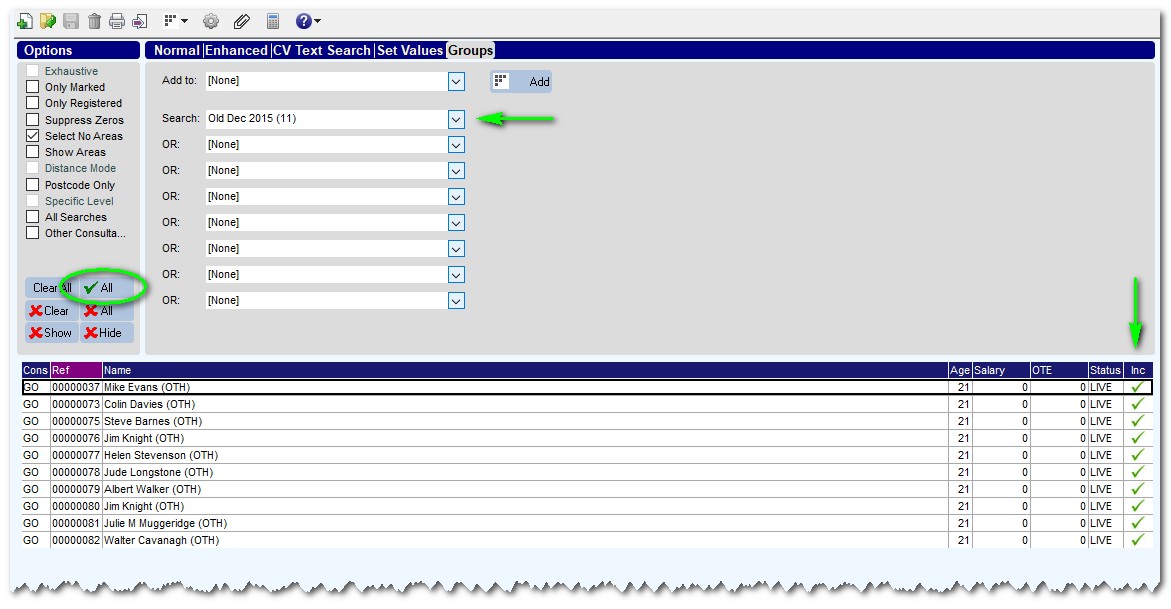
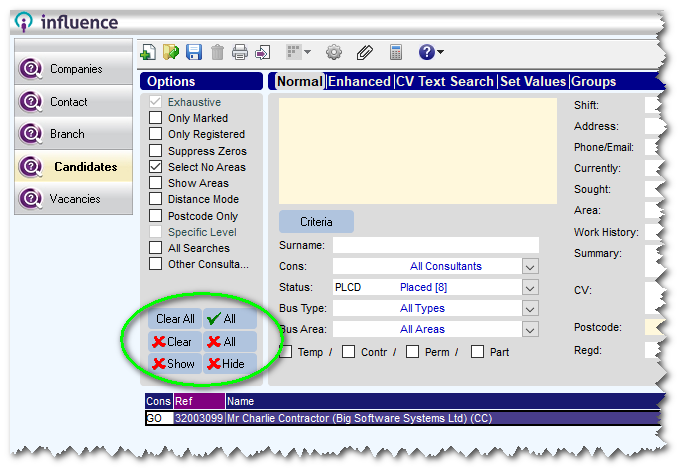
ii) Once the search screen opens, go to the 'Groups' page and specify the Group you wish to use. Then click [Search] at the bottom left of the screen.
iii) Once the results come back use the [Tick All] button to mark all the records.
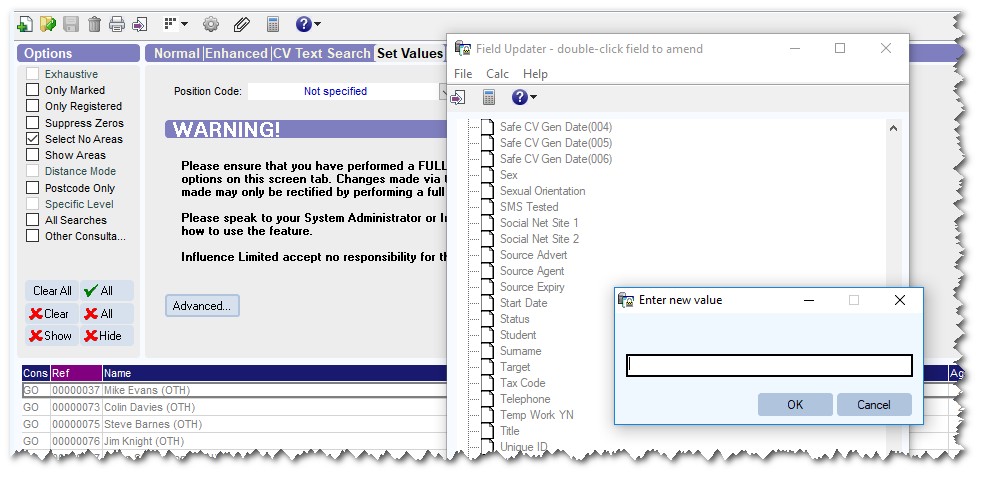
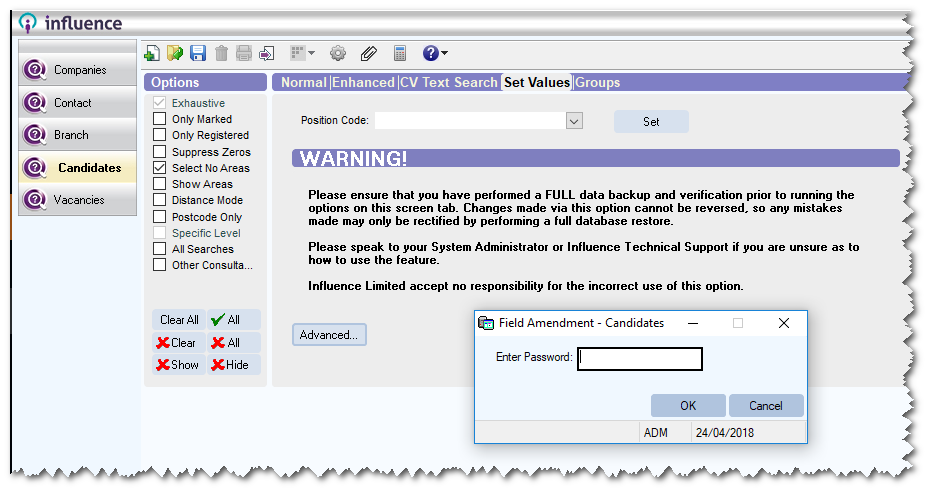
iv) Choose the 'Set Values' page and click the [Advanced] button. When prompted enter the password.
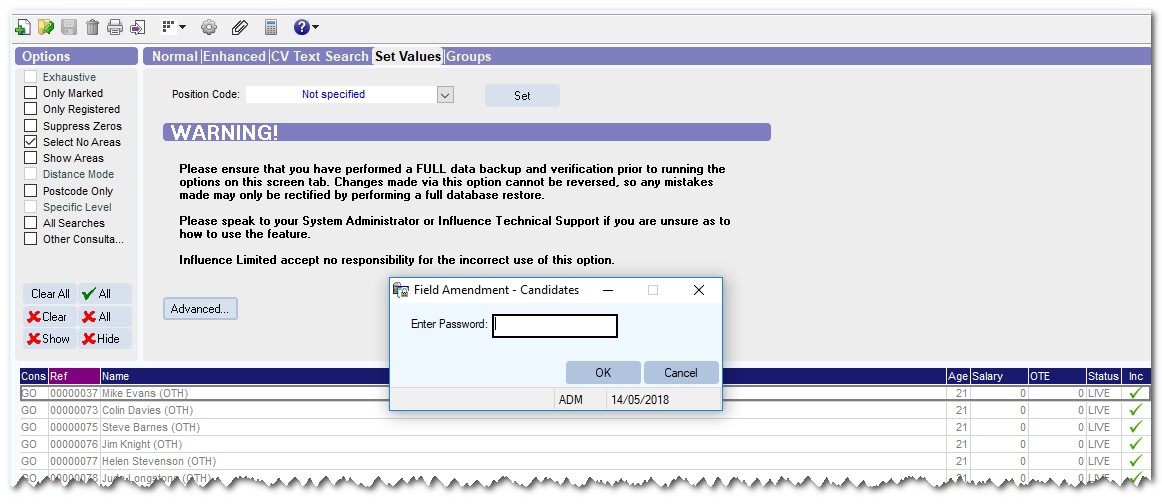
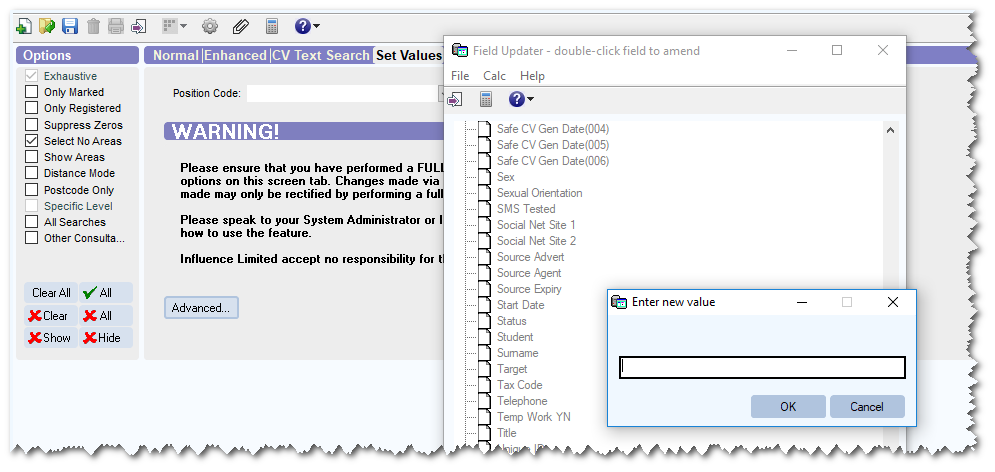
v) Finally, scroll down and choose the Status field, then set the value as DEL.
Delete Records by Status
Once you have a Group of records all at the the deleted (DEL) Status, it is a simple job to delete all of these record from the database. How ?
Login as a suitable, high priority user (e.g., ADM)
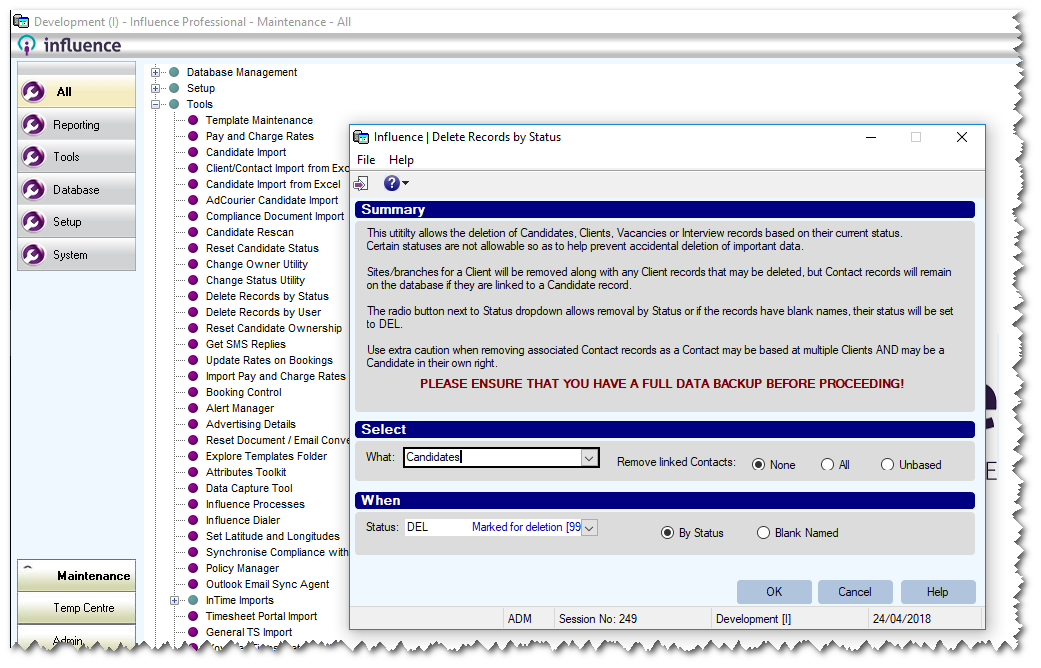
Go to maintenance > Tools > Delete Records by Status.
Choose the record type (e.g. Candidate) - then decide if you wish to remove the linked contacts or not. *
Select the status DEL and choose By Status ( ) then click [OK]

The system will then delete any records on the system where the status is set to DEL.
| * For newer systems, the Screen is slightly different, and there is no 'Remove Linked Contacts' option. (See below) and the system handles this differently. |
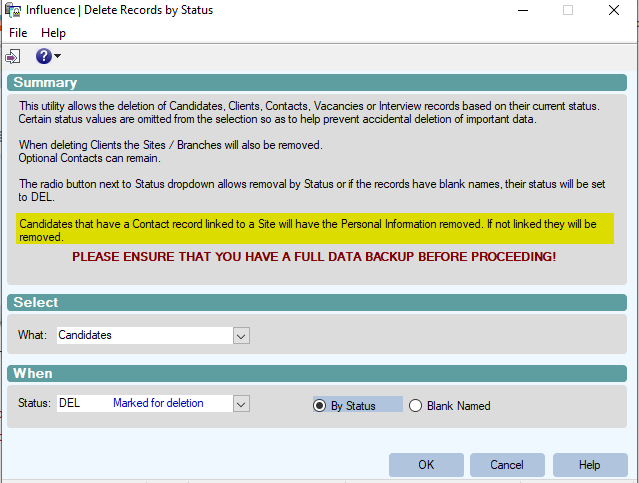
In these systems the Candidate record is removed; The contact record is also removed unless it is linked to an employer/site. In those cases the contact record is left, but any information from the [Personal] tab of the record (related to the candidate) is removed.
Delete batch of Records within Date Range
Sometimes if you wish to clean-up your database it is necessary to delete a batch of Records all of whom were created or added to the database within a selected date range.
This is possible by running a SEARCH to identify all these records, then updating their status to "DEL" (marked for Deletion).
It is then possible to run the tool to remove records marked for deletion.
Example - Candidates
An example procedure is described below. To preform this process you will need to be logged in as your database administrator (ADM) UserID.
The basic process is:
- Run a search for all records with a status of PLACED, which were created in a date range, and mark them with an "X"
- Run the same search again, but this time for ALL candidates, irrespective of status, and mark all if these with a "Tick"
- Use the 'Set Values' function to change the status of all the "ticked" candidates to DEL ( Marked for deletion)
- Finally go into Tools, and use the option 'Delete records by Status' to remove all the records which were set to the status 'DEL'.
Detailed description of example
1) Go to SEARCHING > CANDIDATES and then click [NEW] to start a new candidate search. Once the search opens on the 'Normal' tab and set the status to "Placed".
Then choose the 'Enhanced' page.
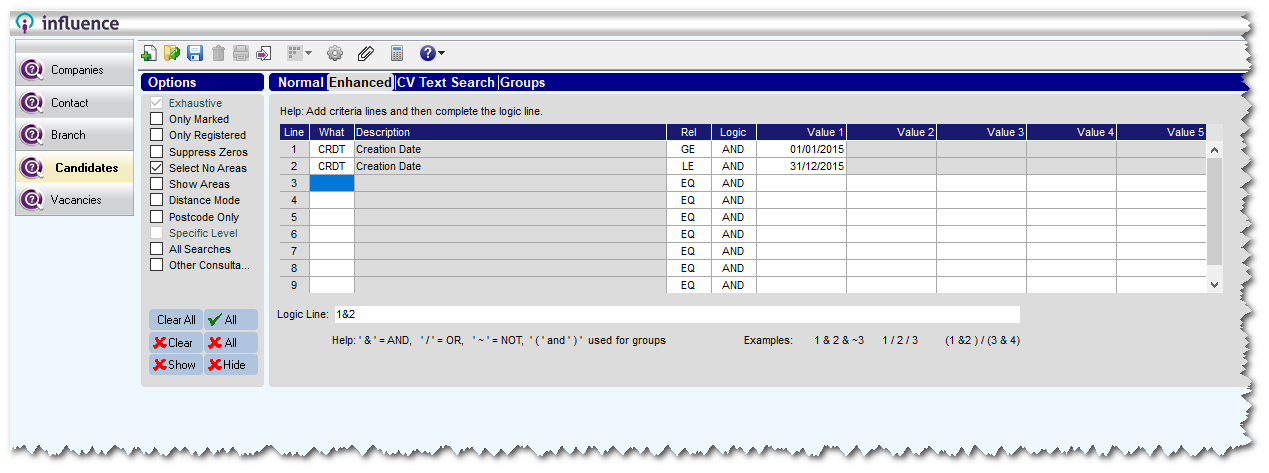
2) On the enhanced page, enter two criteria to specify the date range you wish to search for, e.g. you may want to find candidates added between 01/01/2015 - 31/12/2015 so enter criteria as below.
1) CRDT Creation Date GE AND 01/01/2015
2) CRDT Creation Date LE AND 31/12/2015
Logic Line: [1&2 ]
This 'logic line' tells the system to use criteria one <AND> two. (Example shown below)
3) Once they system has found all the PLACED status candidates, use the button at the left of the 'Normal' tab to mark all candidates with an X ( [X all] )
4) Repeat the above, steps (1-3) but this time look for all statuses and when the results come back mark them all with a tick not a cross.
5) Now choose the 'Set Values' tab within the search. (You will only see this tab if you are logged in as the UserID "ADM" ). On this page click the [Advanced] button and then enter the password*.
6) You will then be presented with a list of fields. Scroll down to the Status field and click on this. When prompted set the value to DEL.
7) Once you have set the statuses, you will need to choose the option Maintenance > Tools > Delete Record by Status. Once the option has opened, select 'Candidates' and Status of 'Del' - this will then delete/remove these candidates from the system.
Removing the candidates deletes their record from the system, and also deletes any JOURNALS that were created. If parameter GDPR, Flag(2) has been ticked, then all documents will also be removed from the candidate folder on the server.
Full On-Disc Deletion of Records
As part of your preparation you may wish to enable full deletion on-disc deletion of all documents and folders when candidates (or contacts) are removed. This is available after version 1.00.17.213, and is enabled using
Maintenance > Setup > Parameters.
File > Open, then choose parameter set GDPR and tick Flag(2)
| NB: On older systems removing a candidate record from the database made the data inaccessible by anyone using the database, but folders and documents remained on the sever within the operating system. |
When files are deleted, the system will remove ALL files (including Journal Attachments, CVs etc.) that are saved/displayed on the [DOCS] page of the candidate record.
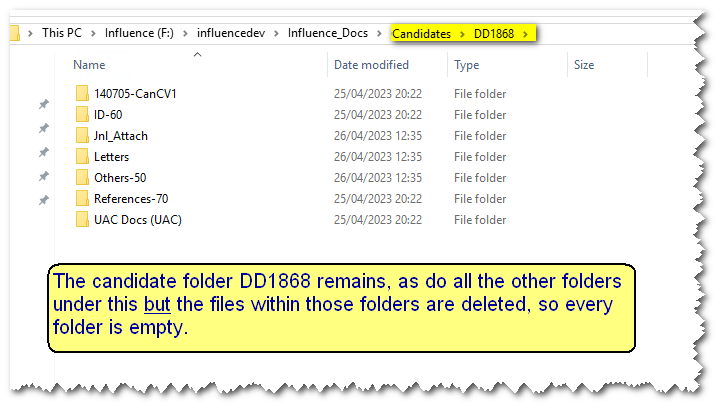
The FOLDER Structure will remain on-disc on the server, but the files themselves will be removed. See below
Graeme Orchard
Comments