After Version 1.00.17.339 we have introduced a Data Policy Management module.
The purpose of this module is to help manage the publication and distribution of Policies, and to track and record acceptance of those policies for people in the database.
Example:
You may have a 'Green Policy' explaining your environmental actions and activities.
You may have a 'General Data Policy' regarding your use and storage of all personal data.
You may have a Privacy Policy explaining how you process and handle data and keep that data secure.
ETC...
Overview
In order to assist in compliance with the GDPR directive, several new facilities have been added to the system. The Policy Manager allows users to record details of their published policies and determine if those policies require an individual within the database to opt IN/OUT from the policy. It is possible to record revisions to policies and versions as well as to store documentation of text relating to the published policy.
Any stored documents of text can be merged into templates such as emails so that they can easily be sent out to individuals within the database.
CONTENTS (Click to jump to that section)
- Use a Policy to control an action
POLICY MANAGER
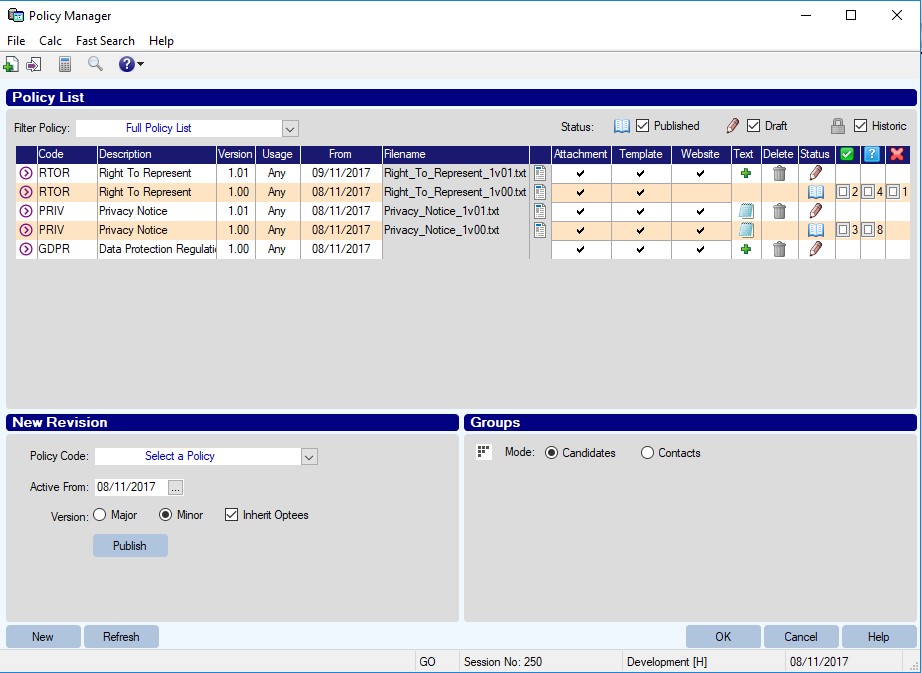
The Policy Manager is where you can store, manage and publish Policies.
Policies are statements regarding how you run your business and what your policies. The can include items such as are use of data, storage of data, environmental responsibilities, etc.
It can be accessed via Maintenance > Tools > Policy Manager
CREATE A NEW POLICY
Click the [New] button at the bottom of the screen.
On the Details tab enter a CODE and a Description.
| CODE |
A 4-digit code for the policy |
| Description |
The description for the policy |
| ACTIVE |
sets the date. (though policies are not 'implemented' until they're Published) |
| Usage * |
You can choose a specific Method e.g. email, SMS which is applicable to this policy. |
| GDPR |
Tick this is you wish to record whether someone has opted in/out of this policy, and be able to see details of this policy on the padlock of the candidate/contact. |
Apply To: Both, CAND (Candidate), CONT (Contact)
From release 1.00.18.206 (or later) it is possible to determine if a policy applies to a Candidate only, a contact only, or is applicable to both candidates and contacts.
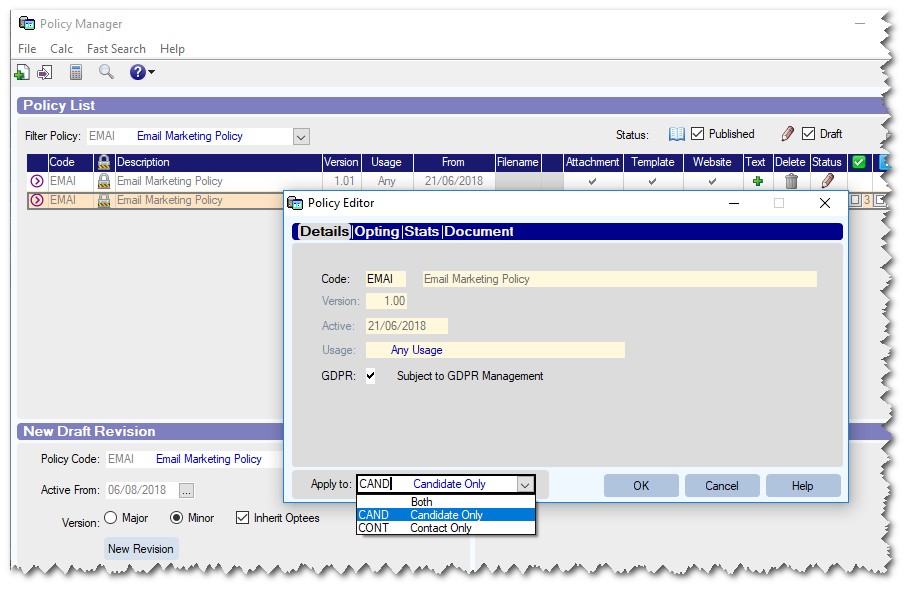
* (At the moment the Usage feature has no functionality but may be used for future development. It is best to set this. e.g. If a policy applied specifically to SMS, then choose the relevant Method.)
The Opting tab allows users to specify TEXT which can be used to opt in/Out of a policy.
Currently this has no functionality but is in place for future development.
The Stats tab has no functionality but is for future development.
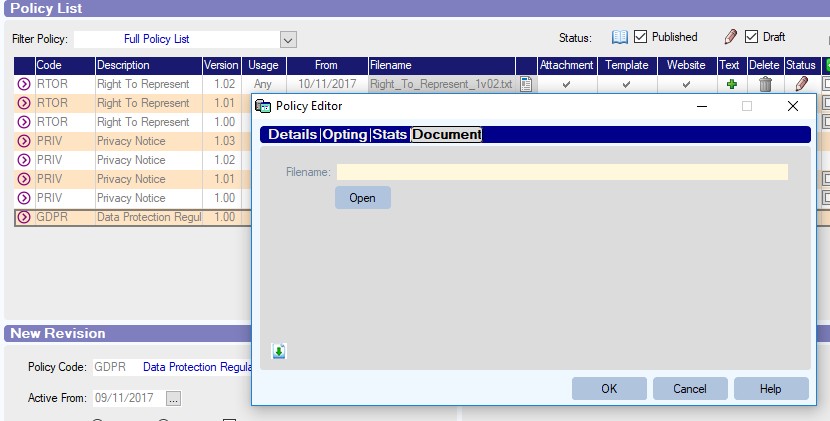
The Document tab will show details of the document (Filename) which contains the details of this policy. Once the policy has been created [OK], it is possible to drag/drop the policy document onto this page.
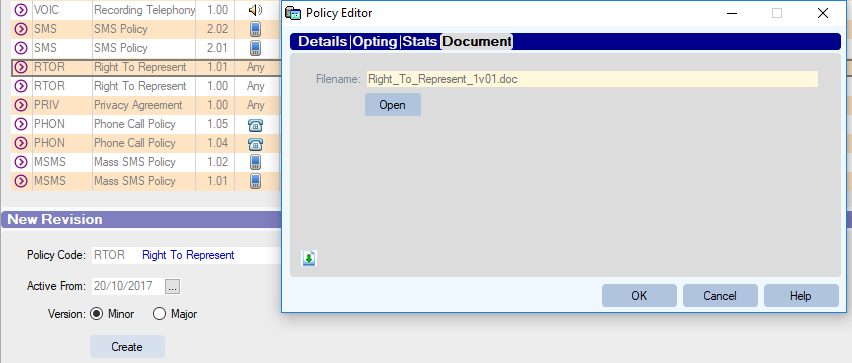
Any document that is dragged/dropped onto this page will be ReNamed to match the policy and given a suitable revision number. (e.g. Right_To_Represent_1V01.doc)
| IMPORTANT: When creating Policies please avoid the codes CON, PRN, AUX, NUL or any code starting COMn, e.g. COM1, COM2, etc. as these are not allowed as folder names within windows. |
MANAGE EXISTING POLICIES
Once a Policy has been created it is possible to manage that policy using the Policy Editor.
(>) Will allow users to drill-in to the setup of that policy to see the Opting Text, Stats and Document.

| Filter Policy |
Use the drop-down to restrict the view to a particular Policy, e.g. Privacy Notice |
| Published [ ] Draft [ ] Historic [ ] |
Use these tick boxes to decide which versions of a policy are displayed. e.g. If you only wish to see the Published policies, then only tick this option. |
| Filename |
This will display the filename of the document associated with the chosen policy. Double-click the filename to open the document. |
To add a new document, simply double-click the filename column, then Drag/Drop the required document onto the screen (see below)
| Text |
It is possible to add TEXT to a Draft policy by clicking the  Existing text is indicated by a  icon. Clicking this will open the text and allow editing. icon. Clicking this will open the text and allow editing. |
| Attachment |
Tick this if the policy document should be added as an item within the attachment manager  in Influence, so that it can easily be attached to Journals and emails sent from the database. in Influence, so that it can easily be attached to Journals and emails sent from the database. |
| Template |
Tick this if the policy & document should be allowed as an attachment Merge Field in templates. i.e. You can add a MERGE field to a template, which will attach this policy document whenever that particular template (email) is sent. |
| Website |
Tick this to indicate that the policy is published/available on your website. |
Tick  |
this column shows how many people have ticked (opted In) to this version of the policy. |
Cross  |
this column indicates how many people have opted out of this version of the policy. |
Question  |
This column shows the number of people where the policy has been 'considered' but no decision has been made yet. |
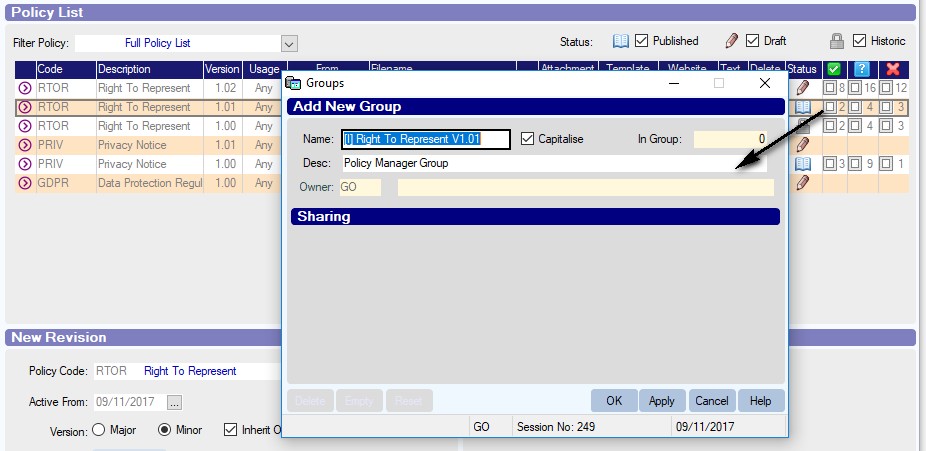
Clicking the small number in any of these columns will offer the user the change to create a GROUP containing those people. The GROUP can then be used to contact all of those people. (See example Below)
CREATE POLICY REVISIONS
Once a Policy has been published, you may (from time-to-time) need to make revisions and publish a new or revised version of the Policy. This is very easy.
At the bottom left of the Policy Editor screen you will see radio buttons for
Minor ( ) and Major ( ) revisions. Simply select the relevant button and press [Create]
EXAMPLE
If you had published Data Policy 1.00 and created a minor revision, this would become Data Policy 1.01, then Data Policy 1.02 etc.
When a Minor revision is created it is possible to inherit the optees.
i.e. Everyone who has opted-in to Version 1.02 could be opted-in to version 1.03
This is controlled with the Inherit Optees [ ] check box., which it ticked by default for Minor revisions-see below.
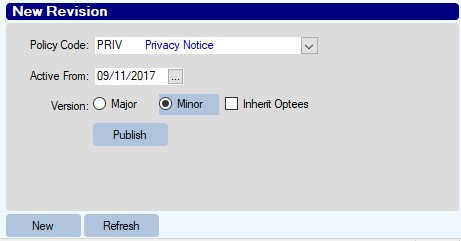
Minor revisions might be used for small changes such as corrections to spelling mistakes or minor wording changes to a policy.
Creating a Major revision would increment the 'main' version number and reset the increment, so Data Policy 1.02 would become Data Policy 2.00
| IMPORTANT: When creating a Major revision it is not possible to inherit optees. |
Major revisions would be used when there is a fundamental change that affects the policy and requires people to re-submit their opt-in/opt-out.
[Publish]: Pressing the [Publish] button will publish the policy and create a new "DRAFT" version of the policy. Each subsequent publication of a policy 'shuffles back' the status of previous policies.
e.g. If you had the situation as below;
Data Policy 1.02 [Draft]
Data Policy 1.01 [Published]
Data Policy 1.00 [Historic]
Publishing a new Minor revision will create a situation as below:
Data Policy 1v03.doc [Draft]
Data Policy 1v02.doc [Published]
Data Policy 1v01.doc [Historic]
Data Policy 1v00.doc [Historic]
GROUPS
At the bottom right of the Policy Manager screen is a GROUPS section.
This is used to switch between Candidate groups or Contact Groups and allows users to see which Candidates have opted In or out from a particular policy, or which contacts have opted in/out from those same policies.
(See below)

USING A POLICY TO CONTROL AN ACTION
(From version 1.00.20.160 or later)
It is possible to get a Policy to control an action. For example you could set the system so that it is not possible to Attach/Send the SafeCV of a candidate until they had subscribed to the "CV Send" Policy.
How?
The process is simple:
i) Create and publish a policy called "SendCV"
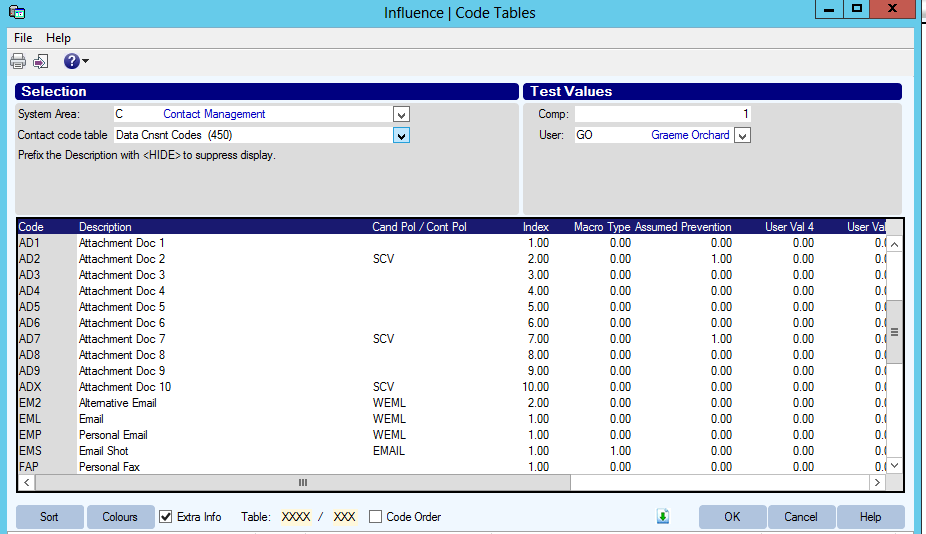
ii) Go to Maintenance > Setup > Code Tables, then select code table "Data Cnsnt Code [450]" and tick Extra Info [ ]
iii) Use the Cand Pol/Cont Pol column to specify the POLICY CODE which will control the action. Use the Assumed Prevention column (set to 1.0) to set the item to 'Blocked' unless subscribed to the relevant Policy. (See below)
Example:
Document 2, 7 & 10 on a candidate record contains versions of their "Safe CV". A new policy "SCV" has been created to record the candidates' consent to their CV being sent out.
To prevent these documents from being sent/attached without this policy being ticked, the Data Cnsnt codes [450] code table has AD2, AD7 & AD10 linked to the policy "SCV"
All of these items (AD2, 7 & 10) are set to "Assumed Prevention" which will stop users sending/attaching these documents unless the candidate has opted-in to this policy
Graeme Orchard
Comments