From version 1.00.16.095 (or later) it has been possible to apply Grid Refinement to a list of data displayed on the workbench screens.
This article explains how to create grid refinements (Styles), how to use/apply these styles and how to Save & Export a style so it can be shared.
Contents (Click an item to jump to the section)
Creating Grid Refinement Templates
- As a personal Grid refinement (ad Hoc) Style
Using/Applying a Grid Refinement
How to Export/Import a Grid Style (refinement)
1. Creating Grid Refinement Templates
There are several ways in which new column refinements (sometimes called Styles) can be created, which are listed below.
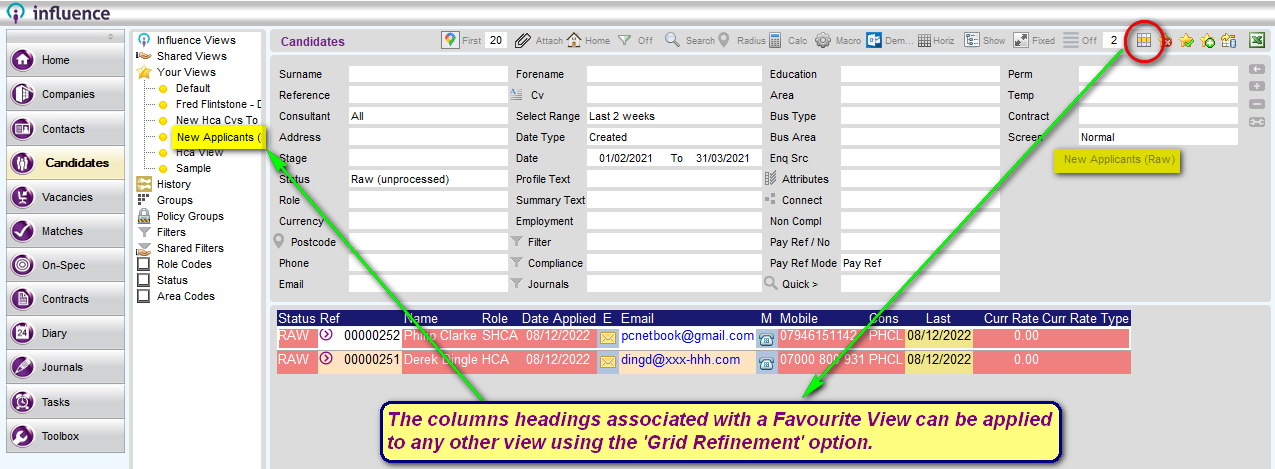
(i) Adding a Favourite View
Every time you create a Favourite View the column layout associated with the view you created is added to the list of possible grid refinements.
e.g. Creating a favourite view for "Candidates Added This Week" which shows
REFERENCE, NAME, PHONE, MOBILE, ROLE, STATUS, LAST CONTACT DATE
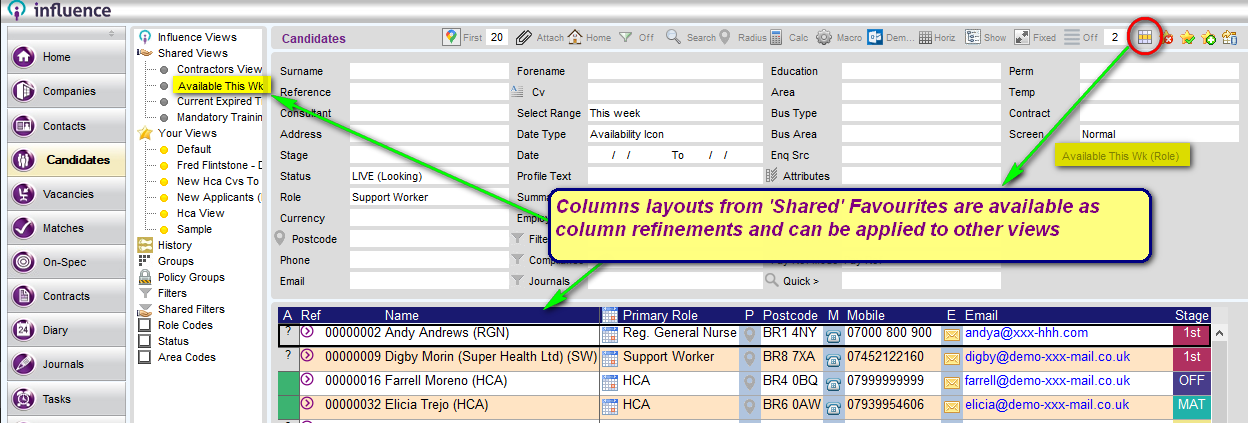
(ii) From a Shared View
The column layouts associated with any shared views will be available for you to select within Column Refinement.
These layouts cannot be edited/amended by users, but can be applied to any selection.
(iii) Adding a new Column Refinement (personal)
At the top right of the workbench there is a column refinement icon.
Clicking the icon allows users to select/apply existing column refinements or to add new column refinements. Column refinements added in this way are personal to the user, and are not associated with any particular view.

Step 1: Click on the Refine Column Selection icon
Step 2: Once the list of Column Views opens, click the green [+ ] icon at the top left of the popup screen.
Step 3: Specify which information should be displayed by completing the [Column No] -
either specify a column to display the information or enter 0 (zero) to indicate the information is not required.
Once done, click [OK] to save/close your column refinement.

2. Using/Appling a Grid Refinement Template
Using grid refinement is very simple.
Use the workbench to search for any data you wish, and press [Refresh] or [OK] to return the results to the workbench.
To apply a grid refinement, simply choose the Refine Column Selections icon at the top right, then choose any one of the stored column views.
3. How to Export/Import a Grid Refinement (Style)
From version 1.00.22.333 (or later) it is possible to export a grid style. This will save the column layout so that it can be imported (shared) by another user or as a 'Safe Copy' of a complicated layout.
Step 1
If you click the Grid Styles button at the top right, you will see a list of all the Styles that exist. All of your personal views have the refine columns icon at the right hand side.
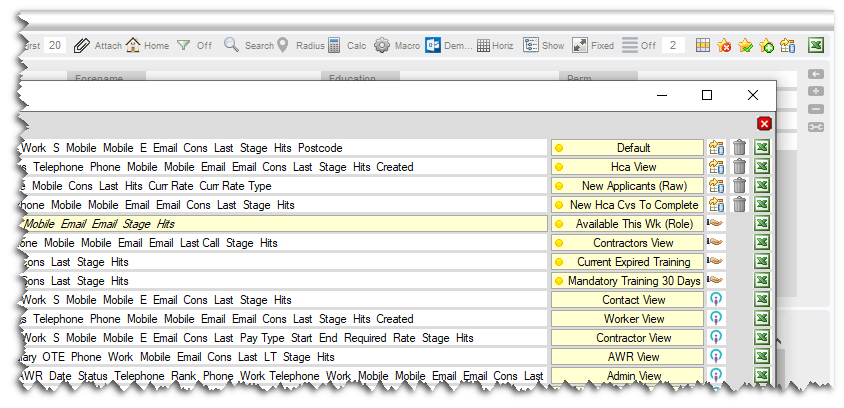
When you click this icon, it will open your grid style and show the column definitions.
Step 2
At the bottom of the column definitions there is an [Export] button. When you click this the system will export the Grid Style as a *.xml file, and then offer to open the folder where the file has been created.
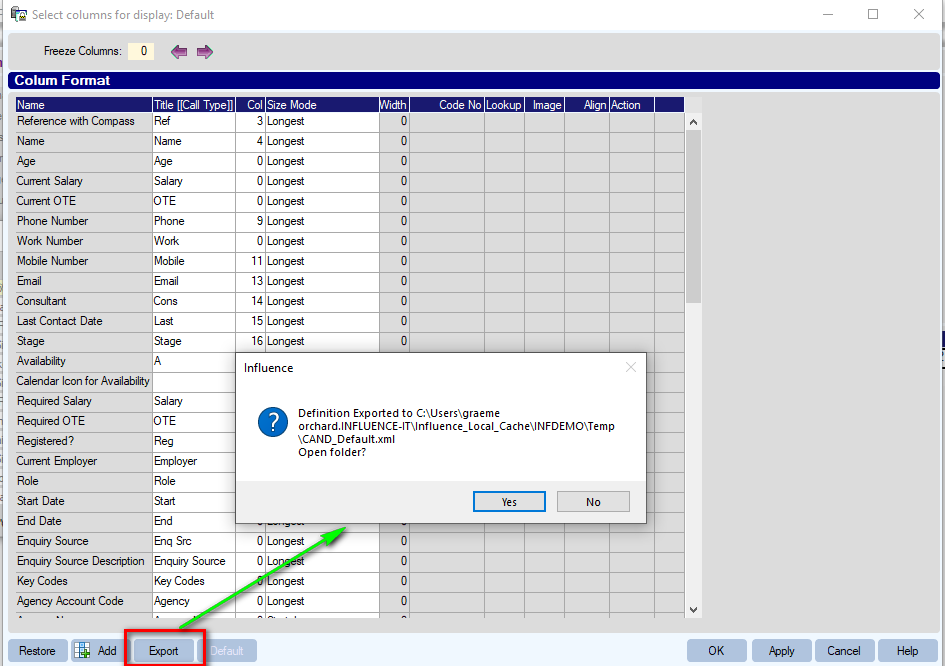
Having created the export you can either email to to a colleague or save the file somewhere else as a 'safe copy' of the grid style and column layout.
Step 3
To IMPORT a saved grid style simply click the Grid Styles icon at the top right.
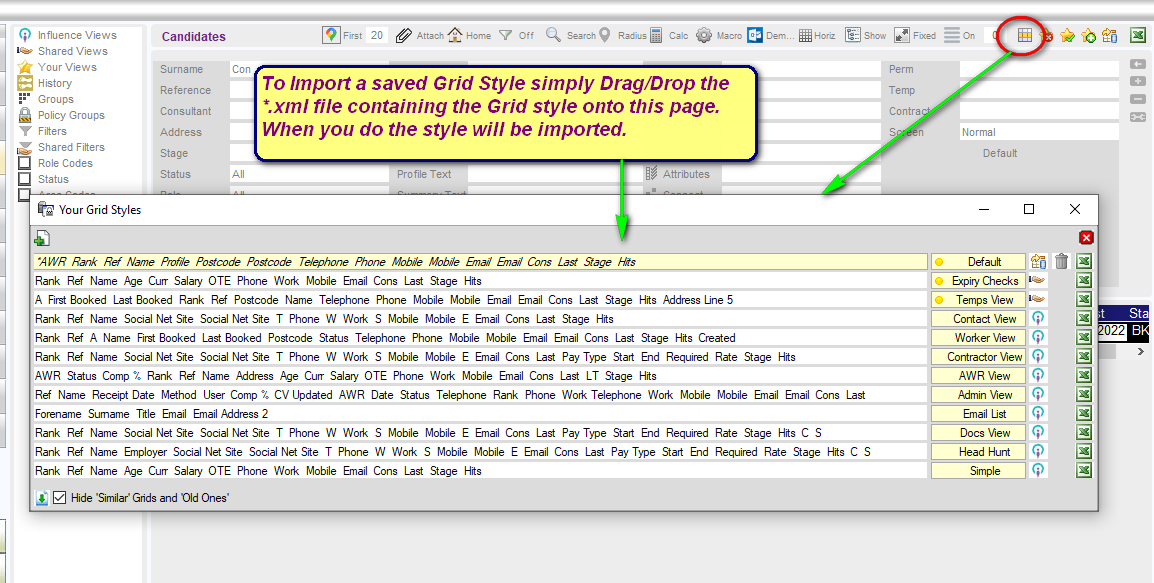
Then just drag/drop the *.xml file containing the Grid Style definition onto this page to import the Gridy Style.
[Keywords: Refine columns, column refinement, refinement of columns, specify columns, choose columns, column choice.]
Graeme Orchard
Comments