In Influence it is possible to perform a search and then email everyone who has come up within that search. This may be useful if you have a vacancy/candidate/worker/cv that you would like to share with a selection of people.
Contents (Click an Item to Jump to that section)
2) Sending a mailshot to all Candidates
4) Adding a file to Mailshot Template
1) How to Send a Mailshot (Macro)
In order to create mailshot to a number of contacts, clients or candidates/workers follow the below instructions:
1) Create a contact/candidate/client search, i.e. using either search or the workbench; find the result of who you want to contact.
| If using search, give the search a name using the 'Description' box at the bottom centre of the screen. <TAB> off the description and click [APPLY] |
2) Click the MACRO icon at the top of the screen to open the macro manager. (Looks like a cog) which will pass the selected names over into the Macro Manager screen.
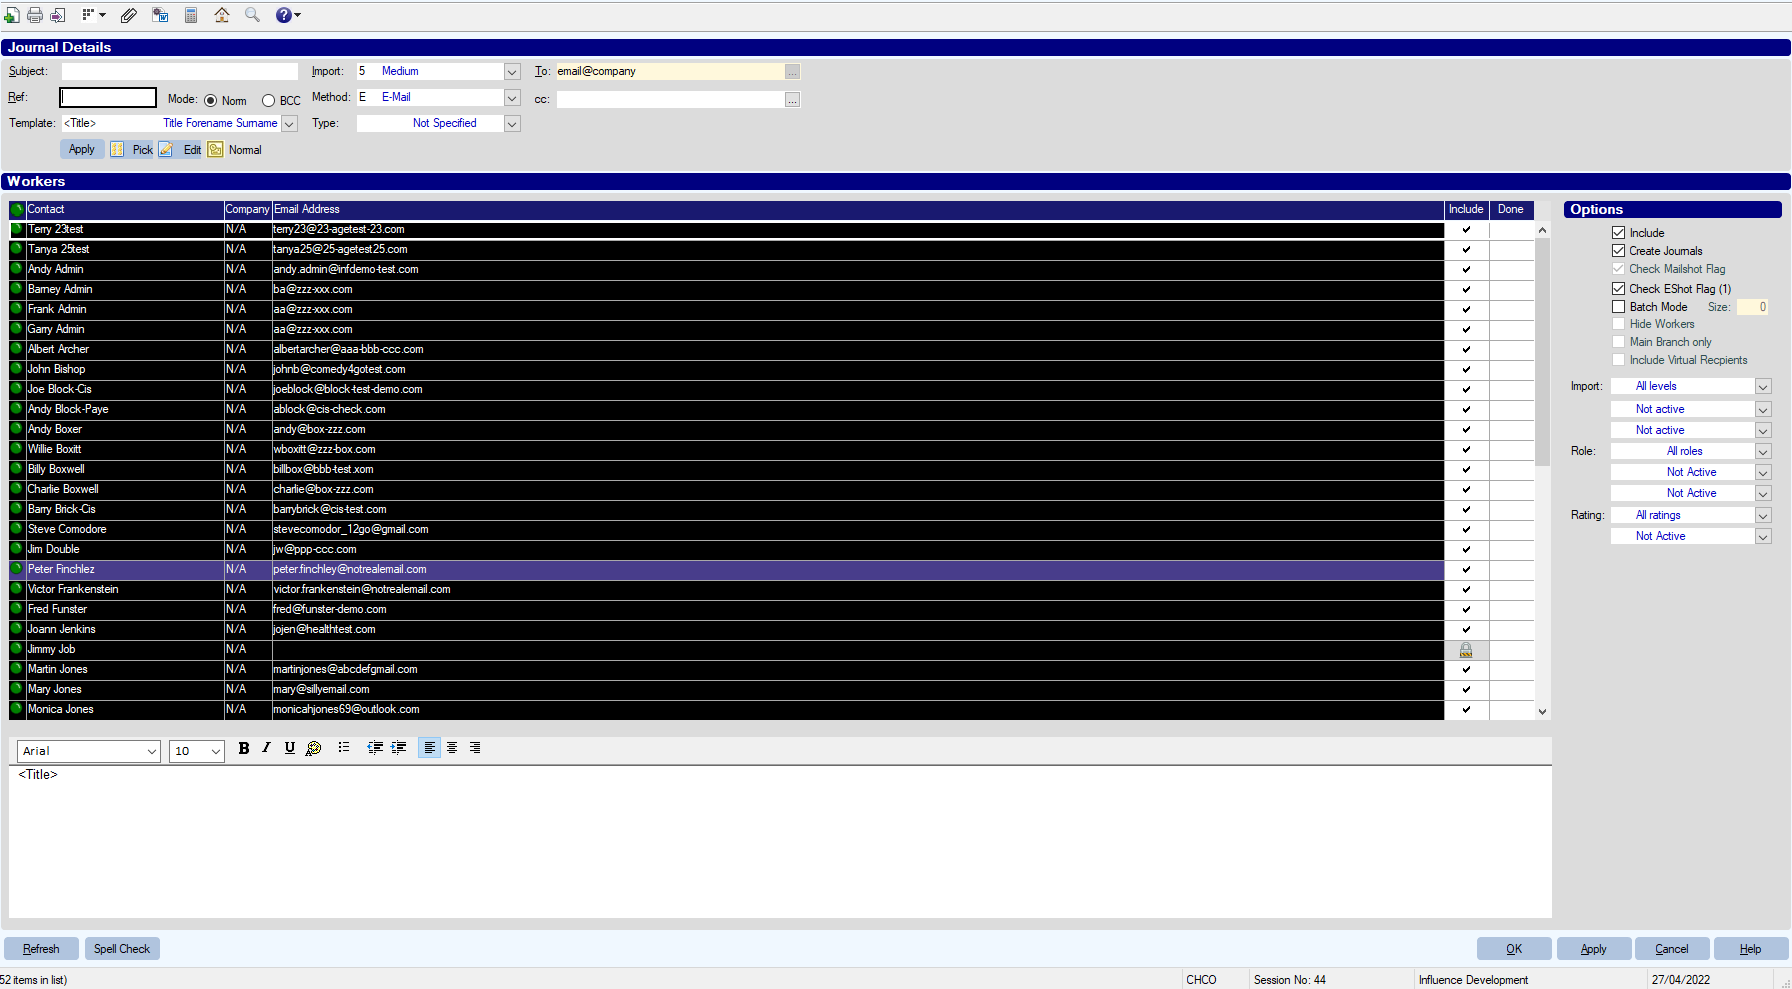
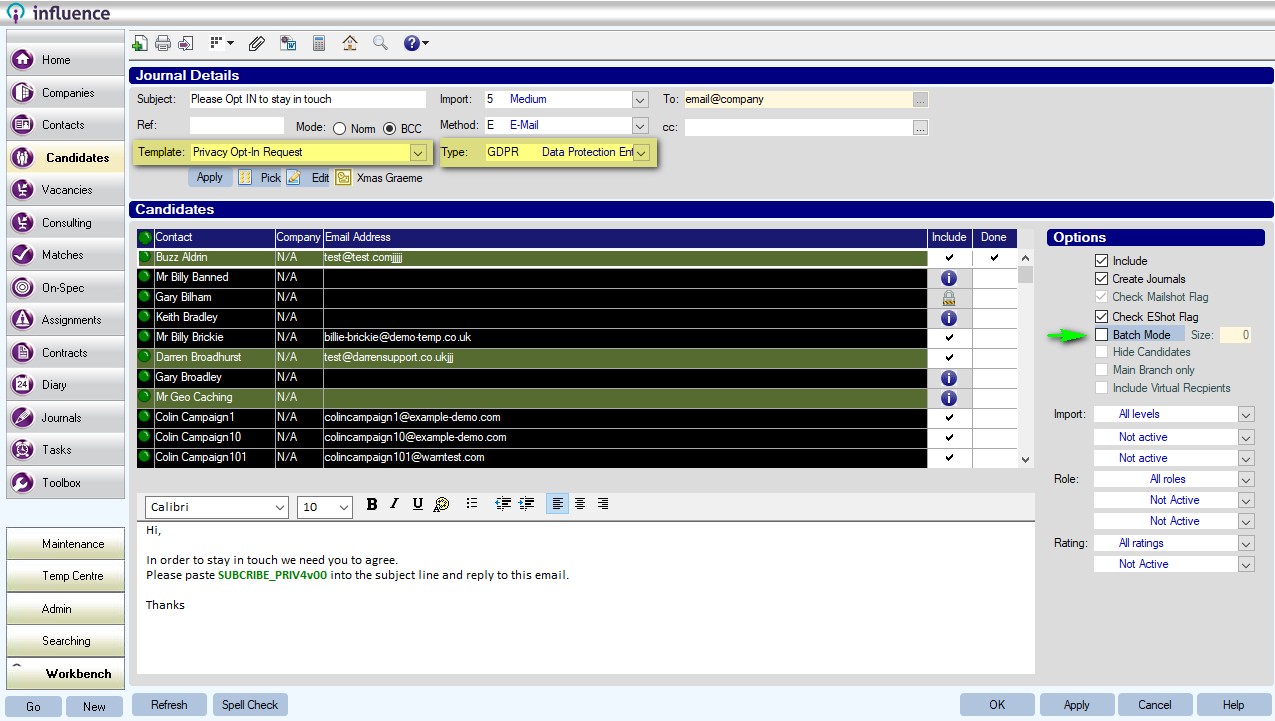
3) Place a tick in the inc column next to the contacts to whom you wish to send the mailshot, and give the search a name using the Description field at the bottom centre
4) Use the 'Type' drop-down at the top centre of the screen to select the Call Type (usually something like MCAN - mailshot to candidates, or MCON - mailshot to contacts)
5)Next use the drop down to select a template. You can either select a previous template you have used and use the [Edit] button to modify the content or simply press [EDIT] to create a new template.
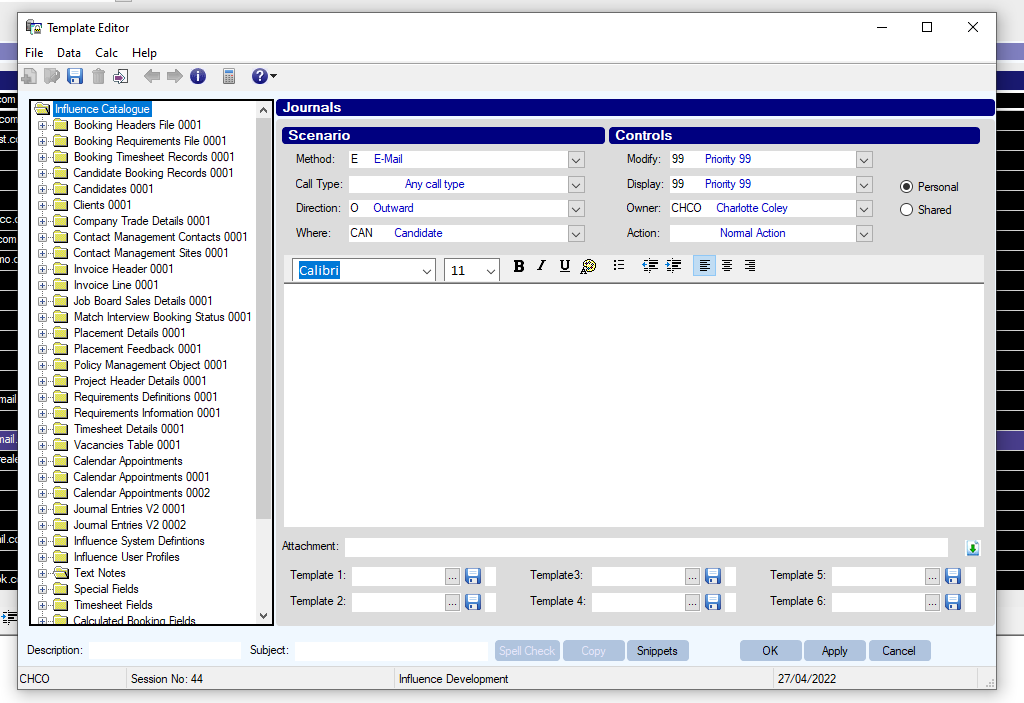
7) In the Template Editor screen you can design the content of your email.
| Tip: If you would like the content of your email to contain information from within the database such as the contacts’ phone number or company name, you can select information from the database using the Catalogue at the left hand side. Simply select the correct section, press the + to expand it, then double-click on the relevant piece of information to insert it into the content |
e.g. The first line of this should normally be Dear [[CMC_CONTACT_FORENAME$]]
(Where [[CMC_CONTACT_FORENAME$]] is a field that will be replaced with the contact forename when the email is sent.
In the case of a candidate mailshot, the field should be [[ENID_FORENAME$]])
| If you are Editing an existing template simply, over-type the main body with the content you want to send, and make sure that the Subject at the bottom centre contains the correct subject line. If you want to create a NEW template, but leave the old one then click [Copy] first, then edit the main body of the email and give your template a Description, and a Subject. |
- Set the priorities (top right) to whatever you would like it to be, and chose whether you would like the template to be personal to yourself or shared to you and your colleagues.
- Give the template a Description using the box at the bottom left.
- Enter the Subject line for the email that they will receive (bottom centre).
8) File Attachment (Optional)
You can also add a document to the template if you would like. Details of how to add an attachment to a Template are shown in the section 4. Adding a File to a Mailshot Template. (Click here to jump to the section below. )
9)When happy with your email template click [OK] This will take you back to the Macro Manager screen. Once here click the [Apply Template] icon (looks like a hand holding a piece of paper).
10) It is recommended that you now TEST one of the emails. To do this, click in the 'Done' column next to one of the recipients. This will pop the email into outlook where you can spell check it, and make sure you are happy with the content before sending
11) To send all the rest tick the small Batch Mode [ ] box at the right hand side of the screen, and choose a batch size if available.
Click [OK].
| Warning: Once you click [OK] with Batch Mode selected ALL the emails will start to be sent and there is no way to stop them after this point! Hence the importance of checking one at stage 10. |
| IMPORTANT NOTE 1: Once you begin sending a batch of emails it is not possible to use your PC to do anything else until the batch is completed. Please bear in mind that if sending a LARGE batch of emails, this may take some time. |
| NOTE 2: When using searches to create Mailshots it is possible to print them as Letters by changing the Method from E - email to L - Letter. |
2) Send an email to ALL Candidates
Sometimes, you may wish to send an email to ALL candidates on the database.
This simple guide shows you how.
1. Go to the Candidates workbench, clear all the filters, tick the Max [ ] option at the bottom left of the workbench and then click [Go] or [Refresh]
This will get a list of all candidates in your system (up to a max of 50,000)
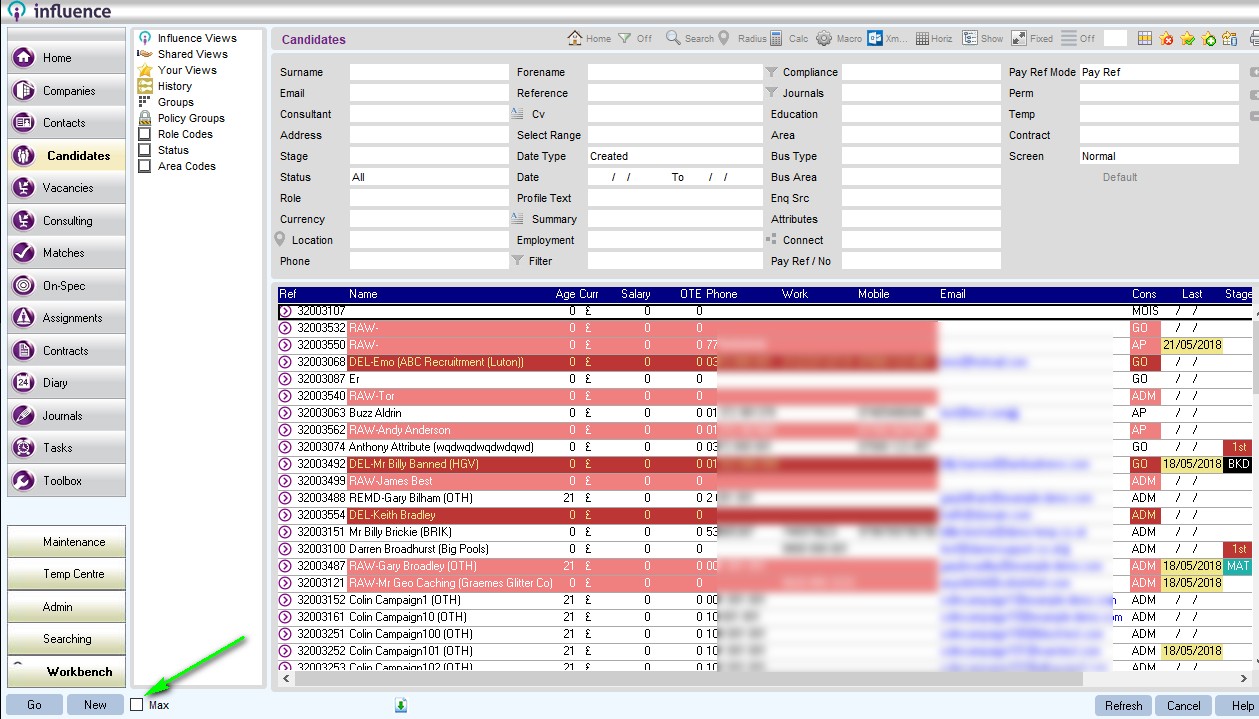
| Tip: If you have built a large GROUP of candidates you can use a similar method to get an on-screen list of all the members of the GROUP. You may want to make a note of the number of candidates listed, which will be shown at the bottom left of the workbench. |
2. Once you have the list of candidates on-screen, click the Macro icon (cog) at the top of the screen to pass the names across into the Macro Manager.
| Tip: When mailing a large number of people it is usually best to choose 'Bcc' mode using the radio button Bcc ( ) |
Write a subject for the email, and then write the content in the large white space.
Optional: If you have written a template email you can use the Type drop-down to select the relevant Call Type, then use the Template drop-down to choose the template. Click the [Apply] button just below the Template drop-down to apply that template to all candidates.
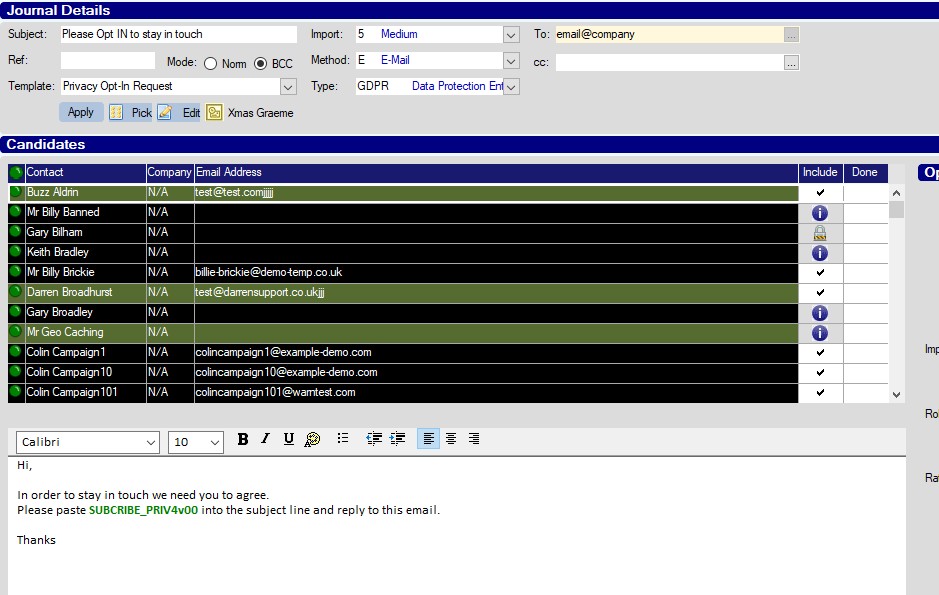
| Tip: Within the macro manager you may want to check that the number of candidates passed over matches the number displayed on the workbench; if not it is likely to be that either (a) They do not have an email address or (b) They have had the e-shot flag turned off on their contact record. In the case of (b) you can over-ride this by unticking the 'Check Eshot flag [ ]' option at the right of the macro manager, which will then display the candidate irrespective of their e-shot preference. |
4. Once happy click in the Done column next to the first person to test one email, which will be passed to outlook
If this is OK, send the email, then come back to the Macro Manager, tick the Batch Mode [ ] option at the right hand side, then press the [Apply] button at the bottom of the screen.
| NOTE: !! After ticking Batch mode and clicking APPLY these emails will now be sent in batches of 50 via MS Outlook. Once started it is not easy to STOP them - hence why it is important that you TEST ONE prior to sending in batches. !! |
This may take a LONG time - depending how many people you are emailing, and the speed of your server and/or the speed of your local PC and MS outlook.
3) Sending a HTML Mailshot
Influence has the ability to send an HTML email/mailshot to a selection of contacts or candidates. This can be useful for sending newsletters, mail shots, Christmas cards, updates, etc. The benefit of an HTML email shot is that it can include pictures and graphical elements quite easily.
As an alternative you can run a search and export a list of candidates or contacts into a 3rd party mailing application such as Mailchimp. You can find out more about Exporting a Contact List
| Important: When using 3rd party services such as Mail Chimp, Survey Monkey etc, please check their Terms of Use for any acceptable usage. These services are given as illustrations only and are not in any way specifically endorsed or recommended by Influence. |
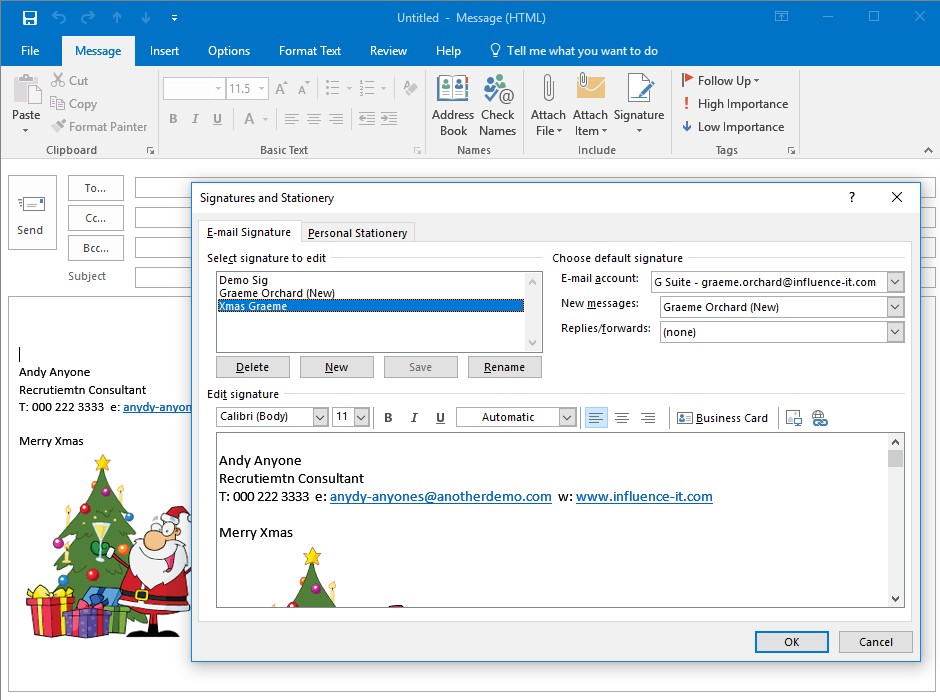
1) Create your email shot as a *.HTML file (many users get an outside agency to do this for them). Once you have your *.HTML file containing your mailshot, login to MS Outlook and create a new signature then copy/paste the content of your HTML email as the signature. Make a note of the name of the signature you have created, e.g. "Mailshot"
(Please refer to your MS Outlook help if you need information about creating email signatures)
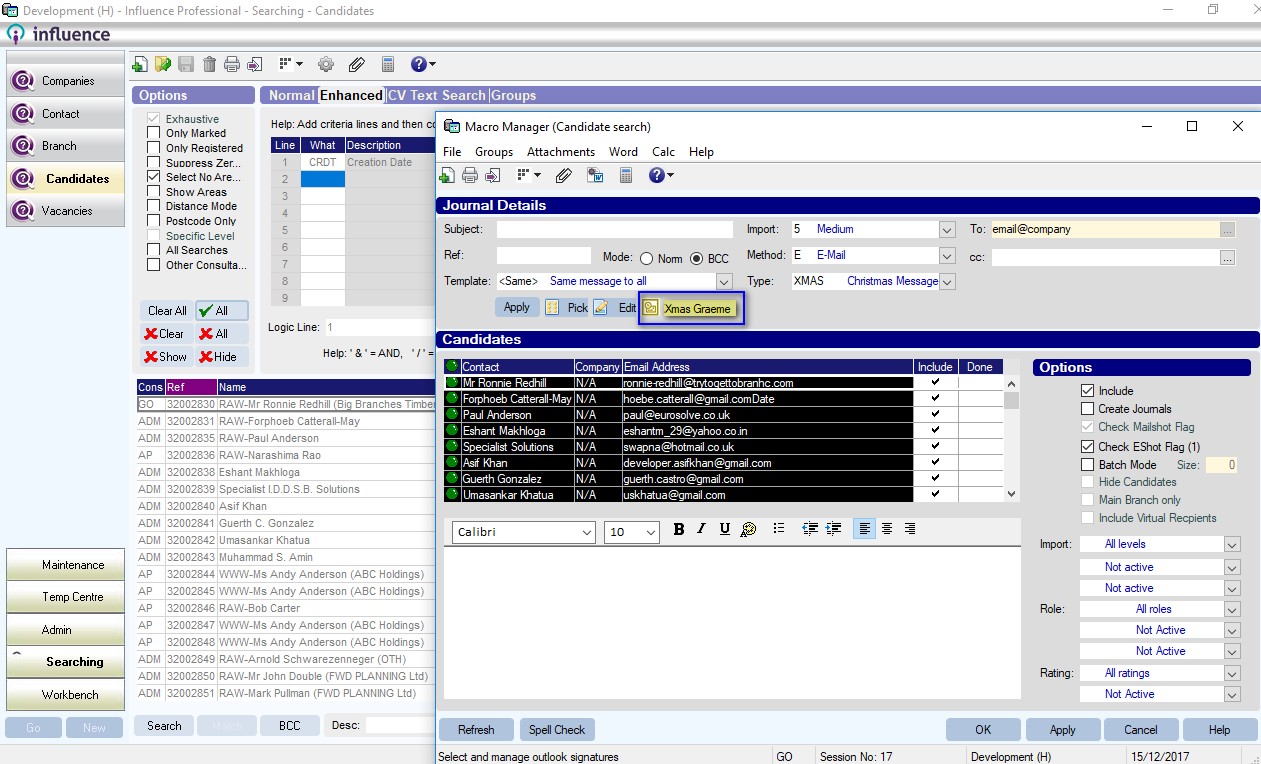
2) Login to Influence and from the workbench and choose either [Searching] or create either a Candidate or Contact search. Run the search and click the ‘Macro’ button.
The system will open the macro manager and will allow you to send multiple emails to the chosen contacts/candidates.
3) Now make sure you click the signature picker button (looks like a small MS Outlook icon) and add the signature that you created in Step 1 (e.g. "Mailshot").
To add it to Influence simply click the word <add> and over-type this with the exact name of your mailshot signature.
| IMPORTANT: The signature file you create should not exceed 327675 bytes (6*65535) but getting close to this is an issue as the whole of the email need including any text to go fit into that same amount of characters/space. |
4) Next select a Call Type using the drop-down menu (often 'MCON' or 'MCAN') and then use the drop-down to select a template. If there is no template or if you wish to create a different template then click the 'Edit Template'
When using the Template editor you may use the catalogue of fields at the left to merge information into the mailshot.
e.g. Contact forename (choose Contact management Contacts >> Forename).
Remember to give your template a description and a Subject. When finished editing the template click [OK] to return to the Macro Manager screen.
| NB: On some older version of Influence the [Apply] / [Edit] buttons have icons rather than displaying the text label. |
5) From the Macro Manager screen you can see a list of contacts (Candidates) to whom the email will be sent. You can check one of the emails by clicking in the 'Done' column. This will pass the email into MS Outlook where you can check the content and layout before sending the email on.
Once checked you can then send all the rest of the emails by ticking the 'Batch [ ]' checkbox at the right then clicking the [OK] button.
Result
When the emails are sent, they will use the ‘Signature’ you created as the body of the email and a separate email will be sent to all of the candidates/contacts in the Macro manager screen.
| Notes On older versions of Influence you will not have the signature picker button. In this case the best way is to create a new Influence user called MAIL and associate this userID with the email signature you created. Login to the database as the userID of MAIL and then create the mailshot as this user. |
4) Adding a File to a Mailshot Template
When performing a mail shot, if you need to send a file attachment at the same time, the best way to proceed is as below:
| TIP: Before you Start creating the template - Use MS Windows Explorer to find the file you wish to attach so that you have this easily to hand. |
1) Create your Contact search, tick all the recipients, then click the Macro Button.
2) From the Macro manager find the template under the relevant Call Type and click the Edit Template button. This will open the Template Editor screen and you can edit the Template if needed.
3) At the top of the screen choose the menu DATA > Open Template Folder.
When the Template folder opens, drag/drop the file that you want into the ../Templates folder.
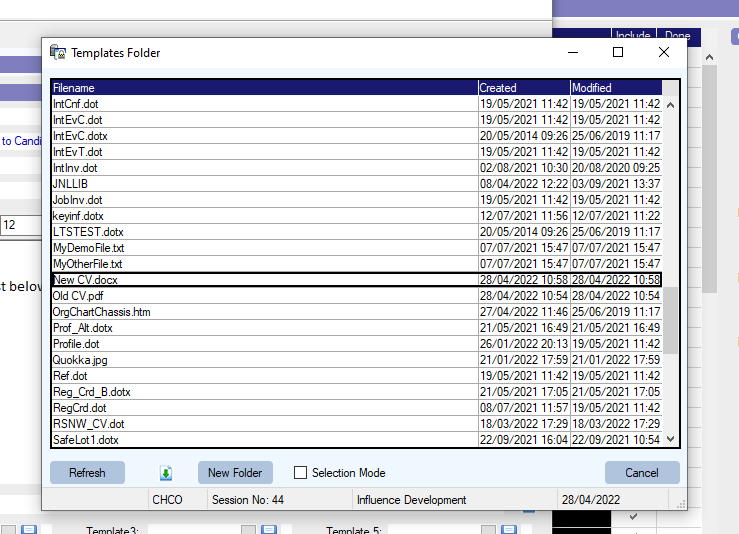
4) Then you can close the Template Folder and go back to the Template Editor and the Attachment bar at the bottom of the screen will be where you now type the exact name of the file.
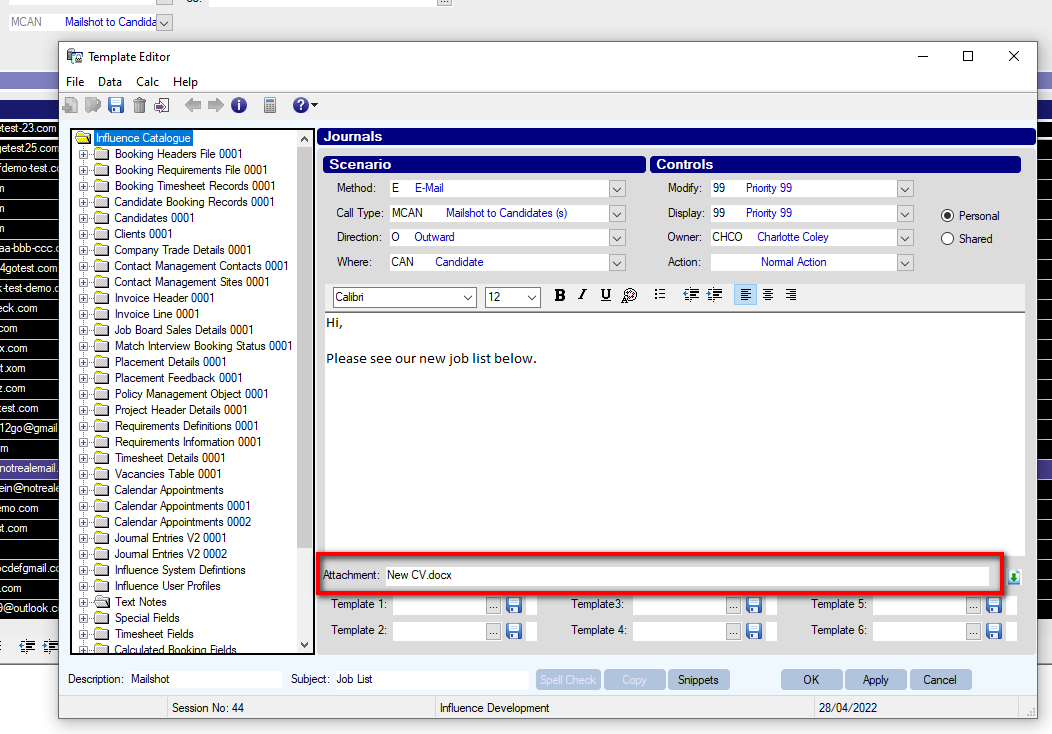
5) When you now go back to the Mailshot it is good practice to perform a test with one email, to check the document has been attached.
If you have typed in the correct filename you will see, when it gets thrown across to outlook, the document as an attachment. ( Check how to perform the test with the above instructions. )
| NOTE: In the ’attachment’ bar of the template, the document name & path cannot exceed 80 characters. |
5) Troubleshooting
Below are listed some problems you may encounter, and the 'likely' fixes
From Feb 2023, Microsoft seem to have made some changes to Outlook/Office accounts that can cause problems IF the Mail account and Data Account in Outlook do not match.
The symptoms: After writing an email ion Influence and clicking [OK] it is passed to Outlook - but when you try to send it, you get an error message a few seconds later saying
DELIVERY HAS FAILED TO THESE RECIPIENTS OR GROUPS
It then mentions something about a STOREDRV error
Remote Server Returned 554.5.6.0 STOREDRV.Submit Exception: Corrupt Data Exception....etc, etc.
(see below for screenshot/example)
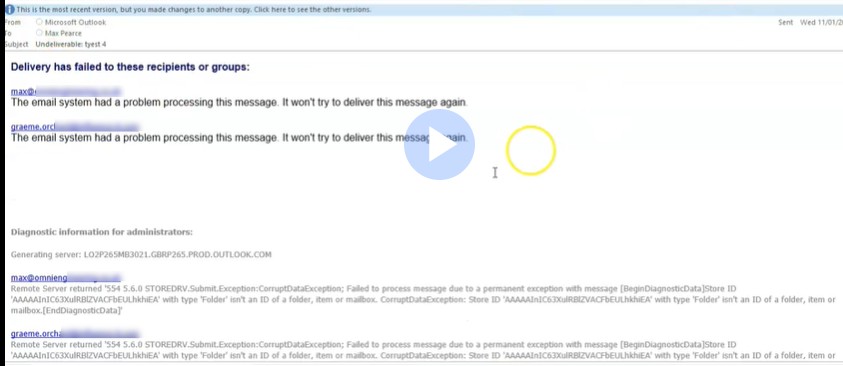
The cause of the problem: If the user has a Hotmail account which is defined as the main email account in Outlook. But my calendar, contacts etc. are not in the Hotmail account but in a separate local .pst file which is defined as default data file. So they have different default accounts for e-mails and data files.
The solution:
As soon as they switch the default data file to the Hotmail data file, the bulk emails are sent without problem:
In Outlook go to the File menu, then click the Account Settings button and select Account Settings...
Make sure, that in the E-mail tab and the Data Files tab the same account is selected as default (white tick in blue circle).
If this is not the case, select the corresponding data file and click the "Set as Default" button. Then close the window.
Now you can send the mails as usual. Don't forget to revert the settings when finished.
Jeremy Heaney (Migrated deleted Agent)
Comments