This article describes how users can edit or personalise existing email templates or add new templates within their Influence system.
Contents (Click an Item to Jump to that section)
- How to open the Template Editor
iii) Set the Description (Subject)
VIDEO GUIDE
This video shows how to add a new email template for a contact. (The principle is similar for candidate emails too). Click below to view video:
https://screencast-o-matic.com/watch/cr61jiVXQs4
Essentially there are 3 steps to follow
- Click on an email address to open the Journal Entry Screen
- Choose a call type, then press the [Edit] button
- Design your Template and (optionally) add any Merge fields. *
| * Tip: At Step 3, if you have opened an existing template you might want to click the [COPY]button at the bottom of the screen to make a new version, rather than edit/amend the template you opened. |
How to Open the Template Editor
There are two ways you can get into the template editor; whether you have access to either (or both) depends upon the priority levels and setup for your UserID in the database. (The UserID of ADM is usually setup to have access to both methods)
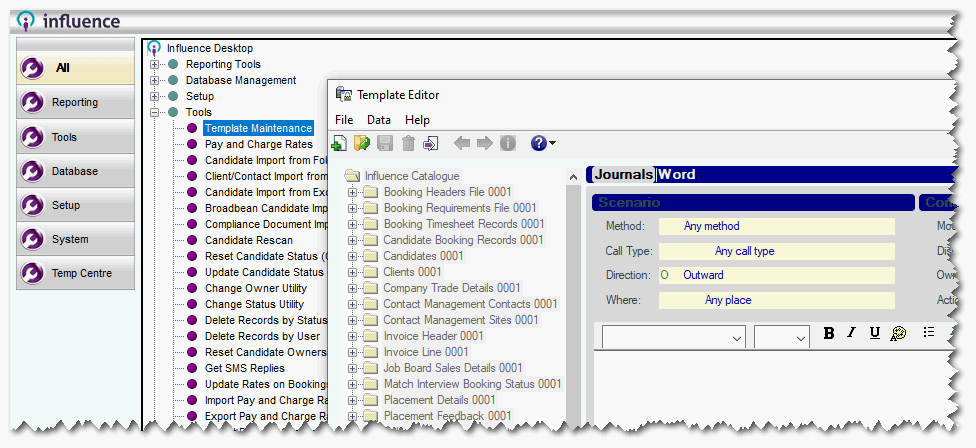
Option (i) - Via Maintenance
You can click on the Maintenance > Tools > Template Maintenance to get to the Journal and Word templates.
Once the option opens be sure to select the [Journals] Tab
Option (ii) - Using [Edit] from Journal Entry
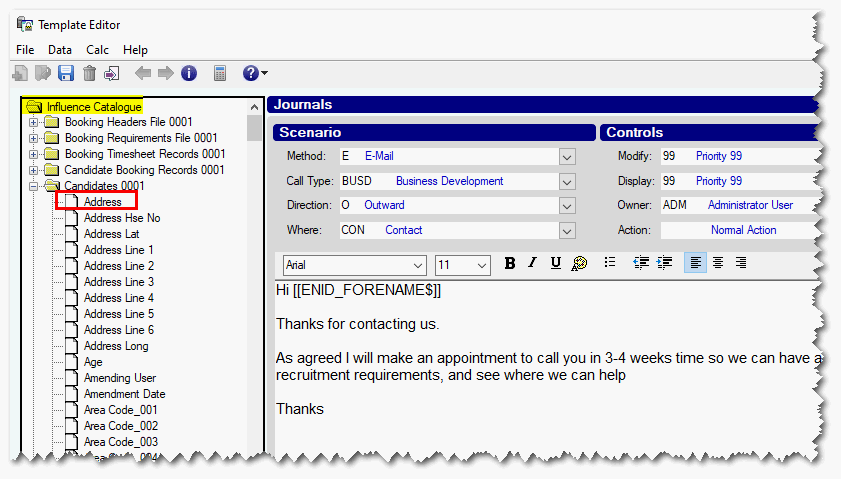
If you click on the email address for an record in the system (Candidate, Contact, etc) the system will open the JOURNAL ENTRY window.
At the right hand side, you can choose a CALL TYPE and a Template. If you click the [Edit] button it will open the Template Editor
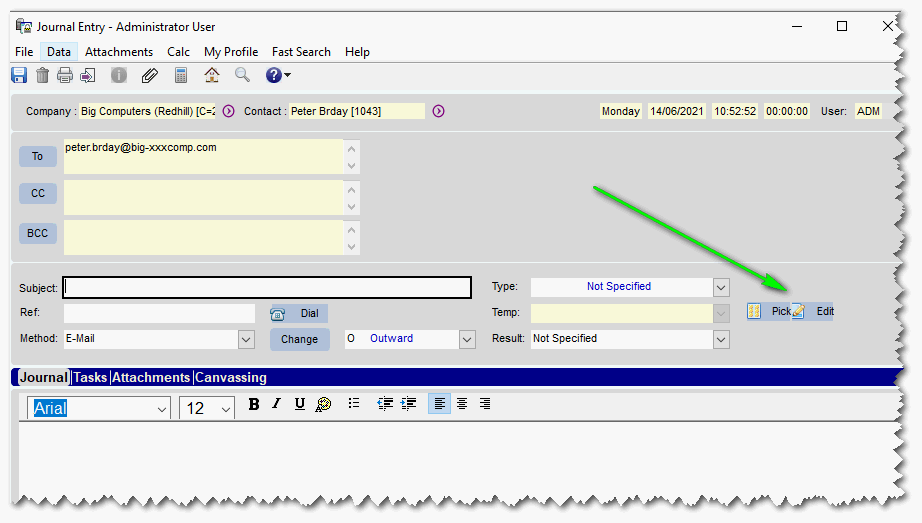
This is usually the easiest/best method to open, edit or amend templates. When opened in this way, the Scenario will usually be correctly set for you, especially if you have chosen a Call Type and a Template
Using the Template Editor
Having opened the Template Editor, you will be faced with a screen as below.
You can either edit the design of the existing template or click the [Copy] button, to create a new template, and then proceed to edit that.
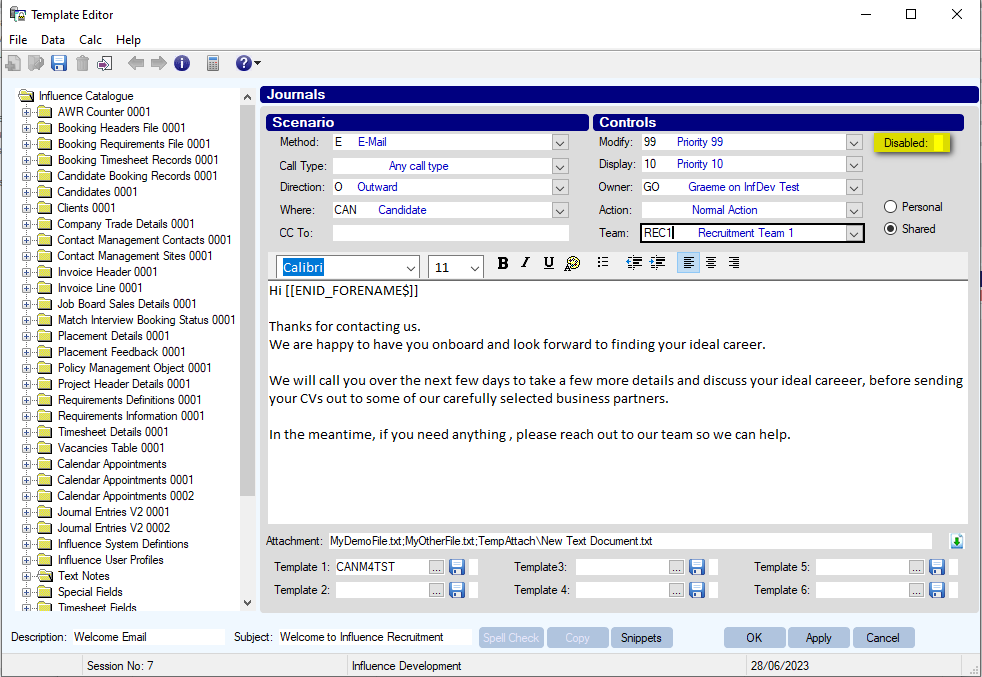
(i) Set the Scenario
The Scenario tells the system when/where to offer this template to users
| Method |
Choose which method this applies to, i.e. is it an email, a telephone script, etc. Use the drop-down to choose the Method. |
| Call Type |
Choose a Call type. This template will only be offered when the chosen Call Type is selected. If left <Blank> then this will ALWAYS appear |
| Direction |
Specify the 'direction' that will be set for this template In/Out (Usually this is left as 'Out' ) |
| Where |
Specify 'Where' this template will appear. i.e. Is it only relevant to a company, a candidate, a vacancy, a match, etc. Leaving this as blank will mean the template is offered 'everywhere' |
| Tip: If you opened the Template Editor using the [EDIT] button on the JOURNAL ENTRY page, the system will have set this scenario correctly for you - which is a good idea. |
(ii) Choose the Controls
The Controls at the top right determine which users can edit and 'See' the template
| Modify |
Priority level of user needed to Amend this template design |
| Display |
Priority level of user to see/be offered this template |
| Owner |
The UserID who created this template |
| ( ) Personal / ( ) Shared |
Is the template only offered to the owner or everyone (shared) - [See Display Priority - above] |
| Team | Use this to restrict visibility to members of a specific 'Team' {For users their Team is set on the [General] tab of the UserID record in User Profiles} |
| Disabled [ ] |
This will disable/hide the template from drop-down lists. Templates must be disabled before they can be deleted. |
NOTE: The use of Teams and Disabling of templates were only introduced from version 1.00.23.145 (or later) - If you require these features, please contact Influence for an update.
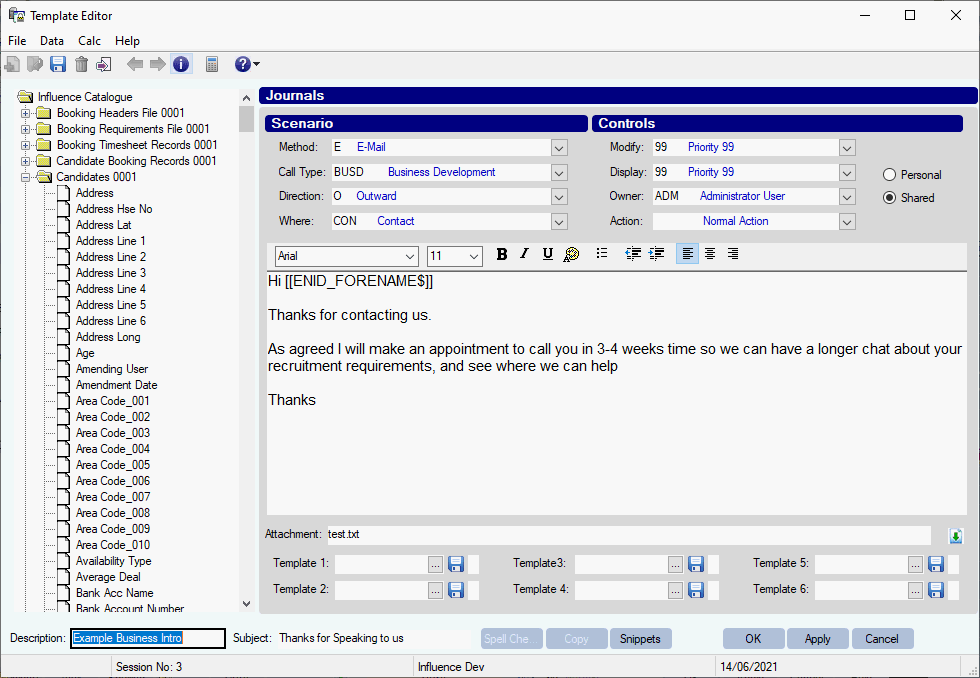
(iii) Set the Description (Subject)
At the bottom left user can set a Description and Subject
| Description |
A Description for the template so that users know what it is |
| Subject |
The Subject for an email, which will also be visible when searching for this item within the database. |
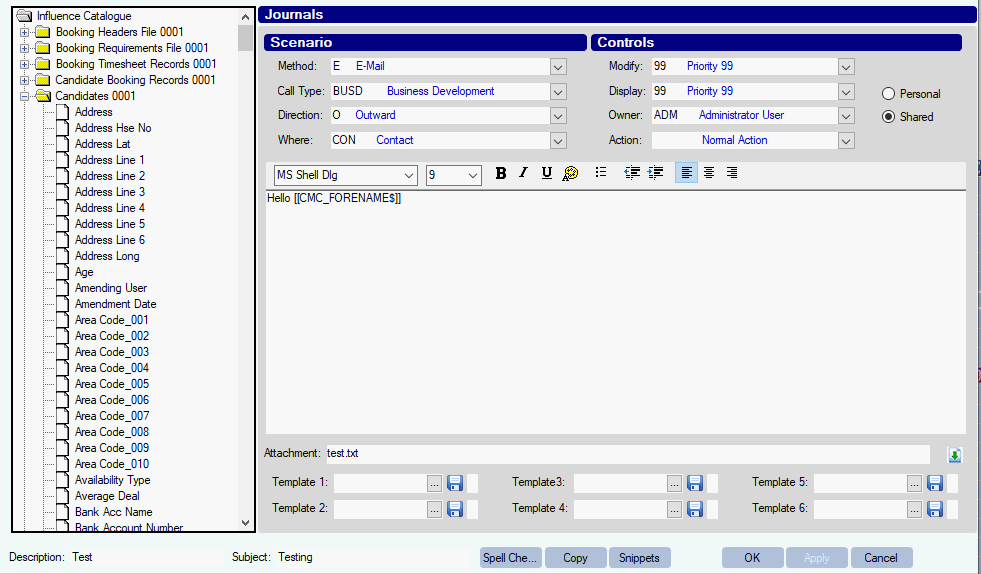
Creating a New Template
If you wish to create an additional template as well as the original, click the [Copy] button at the bottom of the screen.
This will create a copy of the original template, but will set the OWNER to your UserID, and set it as Personal ().
You can change this to Shared if you wish the additional template to be available for all users.
| NOTE: If you are creating a NEW template and there was no 'original' in the first place, then there is no need to [COPY] - simply type the content of your new template into the large white space in the Template Editor window. You can choose any MERGE fields you want in the template (such as candidate Forename/Surname) by using the [Catalogue] section at the left of the screen. |
Adding Merge Fields
If you wish to use merge fields from the database you can choose these from the Influence Catalogue shown at the left-hand side of the screen.
To choose a field simply expand the relevant item in the catalogue at the left hand side using the [+] then double-click on the information you wish to insert into your template.
| Tip: Certain fields may not be available depending on the Scenario e.g. If you have setup a template that has the Scenario set for "Candidate" - then you cannot pull-in fields from the Vacancy. That is why it it usually best to get into the Template editor from the relevant email/Journal, since at the point the 'Scenario' will most likely be set correctly for you. |
(i) Adding Documents or Files
It is also possible to auto attach documents or files to a journal template so they will be automatically sent each time the Journal is sent.
Use the Attachment [ ] field at the bottom of the screen to specify files to be attached. New field can simply be dragged/dropped on here, or click the small 
| Tip: If you have multiple documents to add, the best way is to put them all into a *.Zip file, then add the Zip file as the attachment. |
It is also possible to auto attach word templates to a journal template. When an email is sent the word template document will be generated and sent with the email.
To attach a word template click the [...] and select the appropriate template. Up to 6 of these Make-and-Merge documents can be attached.
Common Merge Fields
If you wish to use merge-fields then you can select them from the Catalogue or simply type them directly into the large white 'Body' are of the Template Editor.
The link below shows a list of commonly used merge fields
https://influence-it.kayako.com/article/23-list-of-common-merge-fields
Graeme Orchard
Comments